
Quick Answer: How to Match Your Space and Shoes
To find the perfect SIV shoe rack for your closet, you must balance your physical closet dimensions with your actual footwear inventory. Start by measuring the exact usable floor width, depth, and height inside your closet, making sure to account for baseboards, door tracks, and low-hanging clothes. Next, count your shoes and group them by height to determine how many tiers and how much vertical clearance you actually need. Finally, compare these requirements against the official SIV product specifications to ensure a seamless fit that preserves your shoes and keeps your closet functional.
Measure Your Available Closet Floor Space
Before browsing any storage solutions, you need to establish the exact physical boundaries of your closet floor. Use a metal measuring tape to find the clear width and depth of the floor space where the rack will sit. Do not just measure wall-to-wall; you must subtract the space taken up by baseboards, door frames, or sliding door tracks that protrude into the usable area. Additionally, look upward and measure how far down your hanging clothes extend, as long dresses or trousers will drape over the floor space and reduce the available height for a shoe rack.

The way your closet doors operate is another critical factor in your measurements. For hinged doors, ensure the rack does not sit so far forward that it blocks the door from closing completely or gets struck when the door swings inward. For sliding doors, remember that you can only access one side of the closet at a time, so the rack must be positioned where it will not block the sliding mechanism or become unreachable behind a fixed panel.
Products mentioned in this guide
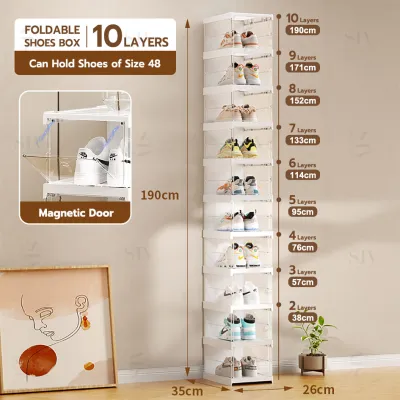
Prices are valid at publication and may change. Please refer to the product page for the latest price.
Finally, consider the logistics of getting the shoe rack into its final position. Check the width of your hallways, doorways, and any tight corners between your home’s entrance and the closet. Whether the SIV shoe rack arrives as a fully assembled unit or a flat-pack kit that you assemble inside the room, verifying these clearance pathways beforehand prevents the frustration of a delivery that cannot reach its destination.
Audit Your Shoe Collection and Capacity Needs
An accurate shoe audit ensures you choose a rack that actually accommodates your lifestyle without overcrowding. Begin by gathering all the shoes you plan to store in the closet and counting them. It is wise to add a buffer of two or three extra pairs to your total count to accommodate future purchases or seasonal changes.
Once you have your total count, group your footwear by height because different styles require different vertical clearances. Low-profile shoes like flats, sandals, and sneakers can sit on shelves with standard clearance, while ankle boots, high heels, and high-top sneakers need taller spacing. In tropical climates like the Philippines, leaving adequate vertical and horizontal space between pairs is especially important to promote airflow and prevent mold growth caused by trapped humidity.
This grouping will help you decide whether a fixed-tier rack or an adjustable-shelf model is better for your collection. If your footwear is highly uniform, a fixed-tier configuration offers straightforward, sturdy storage. However, if your collection ranges from flat sandals to tall boots, a model with adjustable shelves allows you to customize the vertical clearance of each tier, maximizing your vertical space without wasting valuable inches.
Match Your Measurements to Official SIV Specifications
With your closet measurements and shoe audit in hand, you can now evaluate specific SIV shoe rack models. Locate the exact external dimensions—width, depth, and height—on the manufacturer’s official website, product packaging, or instruction manual. Never rely on visual estimates from online photos, as perspective can be highly misleading.
Pay close attention to the usable shelf depth versus the overall external depth of the rack. The usable depth must accommodate your largest pair of shoes without them overhanging the front edge. If your shoes overhang, they can easily catch on sliding closet doors, prevent hinged doors from shutting, or get scuff marks from passing feet. If you wear larger shoe sizes, verify that the shelf depth is deep enough to let your shoes sit straight rather than angled.
Weight capacity is another vital specification that is often overlooked. Check the official manual for the maximum weight limit per shelf and for the entire unit. While lightweight sandals and running shoes place minimal stress on the structure, heavy leather boots, platform heels, or thick-soled work shoes can add up quickly. Distributing weight evenly and staying well within the manufacturer’s specified limits prevents the shelves from sagging or warping over time.
Lastly, compare the total tier count and shelf spacing of the SIV model against your shoe audit. If a model fits your floor footprint but lacks the height or tier count to hold your collection, you may need to look for a taller unit or consider a modular configuration that fits your space constraints while meeting your storage needs.
Common Sizing and Placement Mistakes to Avoid
One of the most frequent mistakes when installing a closet shoe rack is ignoring the depth of hanging garments. Clothes hanging on a rod typically project 50 to 60 centimeters outward from the wall. If your shoe rack is taller than the bottom hem of these clothes, the hanging garments will drape directly over your shoes, crushing delicate fabrics, blocking your view of the rack, and restricting airflow in humid environments.
Another common error is assuming that all shoe racks are universally sized for standard closets. Closet depths vary significantly between built-in wardrobes, walk-in closets, and reach-in closets. Placing a rack inside without verifying the specific SIV model’s depth can lead to doors that jam or a rack that sits awkwardly angled because it cannot fit flush against the back wall.
The floor surface itself also plays a major role in the stability of your shoe rack. If your closet floor is carpeted, a tall, narrow rack may wobble or tilt forward under the weight of your shoes. Always check if the floor is level and stable, and look for models that include adjustable leveling feet or wall-anchoring hardware to secure the unit, especially if you have uneven tile floors or polished concrete.
Frequently Asked Questions (FAQ)
Can I stack multiple SIV shoe racks to increase closet storage?
You should only stack multiple SIV shoe racks if the manufacturer’s official instructions explicitly state that the model is stackable and provide the necessary securing hardware. Attempting to stack non-stackable units can lead to severe tipping hazards, structural failure, and potential injury. Unsecured racks can easily slide or topple under the weight of your shoes, so always prioritize safety and follow the official guidelines for vertical expansion.
What if my SIV shoe rack is slightly too deep for my closet?
If your shoe rack is slightly too deep, first check if you can adjust the depth of your hanging rod or move the rack to a different wall inside the closet where it will not interfere with the door. If the unit still obstructs the door swing or sliding tracks, do not force it into place, as this can damage both the rack and your closet structure. In this situation, the safest and most practical solution is to return or exchange the unit for a shallower model that fits your closet’s physical limits.

Community discussion
Share your experience or ask a question. Comments are reviewed before publication.