
Optimizing a home office requires a smart balance between accessibility, style, and space management. In many Philippine homes, where floor space in urban condominiums or suburban townhouses can be limited, utilizing vertical space is the most efficient way to organize books, files, and decorative items. Wall-mounted display shelves offer an elegant solution to keep your desk clutter-free while personalizing your work environment. However, choosing the right shelving system involves more than simply picking an attractive design; it requires a clear understanding of your wall structure, weight requirements, and local environmental factors.
To find the ideal wall-mounted shelves for your workspace, you must evaluate the physical constraints of your room, the structural integrity of your walls, and the specific items you plan to display. Tropical climates present unique challenges, such as high humidity, which can affect certain materials over time. By taking a systematic approach to assessing your space, comparing material durability, and understanding proper installation techniques, you can select a shelving system that is both safe and visually appealing.
Assessing Your Space and Wall Conditions
Before purchasing any shelving unit, you must measure your available wall space and determine where the shelves will sit in relation to your desk. Start by measuring the vertical clearance above your computer monitor or laptop setup. If you use a dual-monitor mount or a large desktop screen, ensure the lowest shelf sits at least 50 to 60 centimeters above the desk surface to prevent physical interference and visual crowding.
Products mentioned in this guide
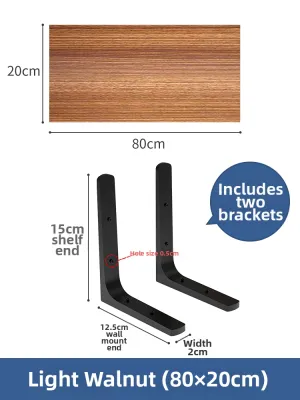
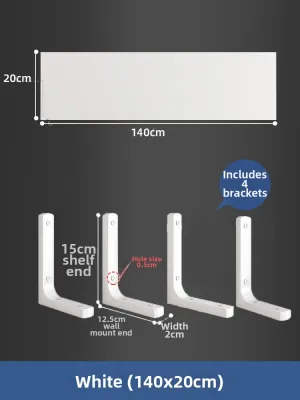
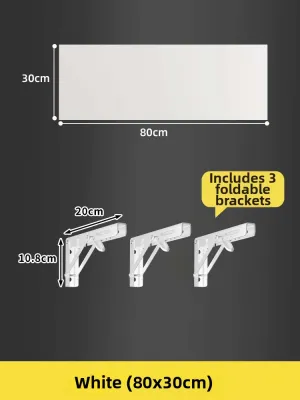
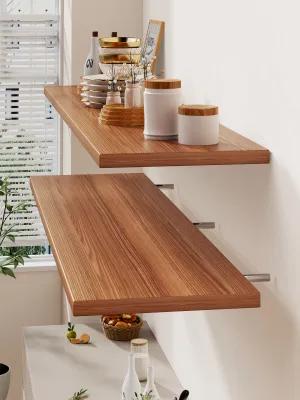
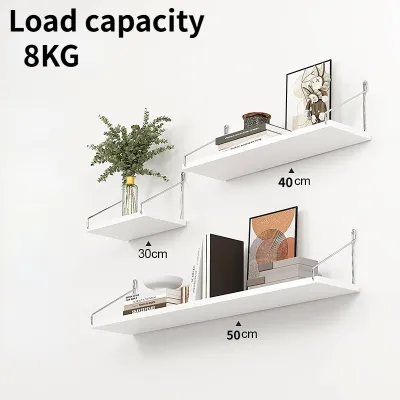
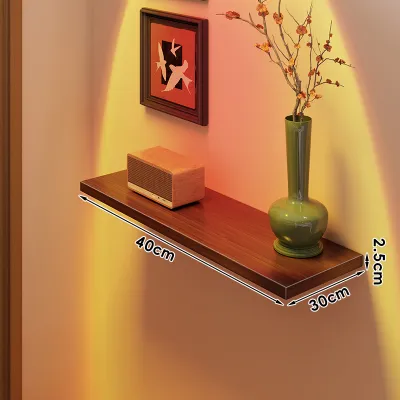
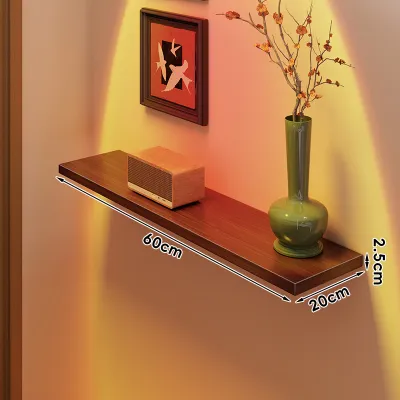
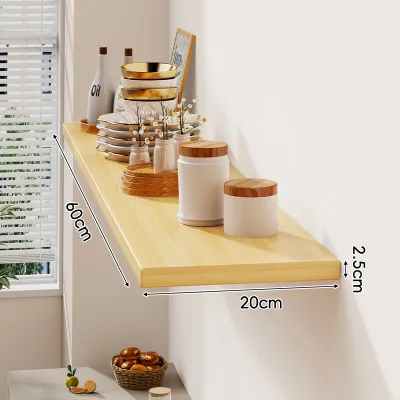
Prices are valid at publication and may change. Please refer to the product page for the latest price.
Ergonomic reach zones are equally important when planning your layout. Items that you need to access multiple times a day, such as reference manuals, notebooks, or stationery bins, should be placed within your primary reach zone—typically on the lowest shelf where you can grab them without standing up. Decorative items, archival folders, and plants can be placed on higher shelves that require standing or a step stool to reach.
Identifying your wall material is the most critical safety step in this process. In the Philippines, residential walls are commonly constructed from solid concrete, concrete hollow blocks (CHB) with plaster coating, or drywall (gypsum board) over metal or wooden studs. Concrete and masonry walls offer exceptional load-bearing capacity, but they require a hammer drill, masonry drill bits, and plastic wall plugs (commonly referred to as tox plugs) to secure the mounting screws.
Drywall partitions, which are common in newer condominium developments and office renovations, have much lower weight limits and require specialized hollow-wall anchors, such as toggle bolts or self-drilling drywall anchors. Attempting to mount heavy shelves directly into drywall without locating the underlying studs or using the correct anchors can lead to structural failure and severe wall damage.
To calculate your weight capacity needs, make a realistic list of the items you intend to display. A single linear meter of average hardcover books can easily weigh between 20 and 30 kilograms, which requires heavy-duty brackets and solid wall anchoring. In contrast, a setup dedicated to light decor, such as framed certificates, small action figures, and lightweight plastic organizers, will put significantly less stress on your wall and hardware.
Evaluating Shelf Materials and Structural Features
When browsing online marketplaces or local furniture showrooms, always check the manufacturer’s specified load limits rather than assuming strength based on material names alone. A shelf labeled as “solid wood” may still have a low weight capacity if the mounting brackets or internal support mechanisms are poorly designed. Reliable manufacturers will provide clear weight ratings for both drywall and concrete installations.

Material selection is highly influenced by the local tropical climate. High relative humidity can cause untreated or poorly sealed wood products to warp, sag, or develop mold. Standard particleboard and low-grade medium-density fiberboard (MDF) without proper edge banding are particularly susceptible to moisture absorption, which weakens their structural integrity over time. For long-term durability, look for moisture-resistant MDF, marine-grade plywood, or solid local hardwoods like acacia, tanguile, or mahogany that have been treated with a protective polyurethane or lacquer finish.
Metal shelves made of powder-coated steel or aluminum are excellent alternatives for a modern, industrial-style home office. The powder coating protects the metal from rust and corrosion, which is especially important in coastal areas or non-air-conditioned rooms. Metal shelving systems often feature modular tracks that allow you to adjust the height of individual shelves as your storage needs change.
The choice between hidden floating brackets and visible L-brackets significantly impacts both aesthetics and weight capacity. Floating shelves utilize an internal metal bracket with prongs that slide into pre-drilled holes in the back of the shelf board, creating a clean, minimalist look. However, because the weight is concentrated on a narrow internal rod, floating shelves generally support less weight and are best reserved for light decor and small paperbacks.
Visible brackets, such as classic L-shaped metal brackets, gusseted brackets, or vertical wall tracks, provide superior vertical support by distributing the load over a larger surface area on the wall. These systems are highly recommended for heavy book collections, printers, or filing boxes. Additionally, consider the depth of the shelf board; standard office shelves range from 15 to 30 centimeters. A shallow 15-centimeter shelf is perfect for small items and keeps the room feeling open, while a deeper 25 to 30-centimeter shelf is necessary to accommodate standard binders and storage boxes.
To prevent items from accidentally sliding off, look for shelves with integrated design features like raised front lips or side panels. These features are particularly useful if you live near busy roads where traffic vibrations can cause small items to shift, or if you plan to display round objects, pens, or framed art prints that do not sit perfectly flat.
Matching Shelf Configurations to Your Display Items
Aligning your shelf layout with the specific items you plan to store ensures both functional efficiency and visual harmony. If your primary goal is heavy book storage, opt for a linear, stacked configuration using thick shelf boards (at least 2 centimeters thick) and robust, visible brackets. To prevent the wood from bowing under the weight of heavy textbooks, space your wall brackets closer together—ideally every 40 to 50 centimeters rather than the standard 60 centimeters.
For decorative setups, you can be more creative with staggered, asymmetrical, or geometric shelf arrangements. Staggered floating shelves of varying lengths create an eye-catching backdrop for video conference calls. When displaying indoor plants like pothos or snake plants, ensure the pots sit on waterproof saucers or coasters to protect the shelf finish from water rings and soil moisture during watering.
If you need to organize daily work supplies, look for shelves that incorporate under-shelf utility features. Some designs include built-in metal hooks for hanging headphones and cables, while others feature magnetic strips underneath to hold metal stationery items. You can also place small, lightweight storage bins or woven baskets on lower shelves to conceal loose items like chargers, USB drives, and sticky notes, keeping your primary desk surface completely clear.
Grouping your display items by weight and frequency of use will help maintain a balanced look and prevent structural strain. Place your heaviest books and equipment on the lowest, most securely anchored shelves. Use the middle shelves for active reference materials and daily office tools, and reserve the highest shelves for lightweight decorative pieces, awards, or seasonal archives that you rarely need to access.
Installation Requirements and Safety Boundaries
Proper installation is the single most important factor in ensuring your wall shelves remain secure and do not damage your home office. Before drilling any holes, use a reliable stud finder to locate wooden or metal studs if you are working with a drywall partition. Securing your mounting brackets directly into these studs is essential, as drywall alone cannot support the leverage exerted by a loaded shelf.
For concrete or masonry walls, use a hammer drill equipped with a masonry drill bit that matches the diameter of your wall plugs exactly. Drill the holes slightly deeper than the length of the plug to ensure it sits flush with the plaster surface. Insert the plastic or metal plugs firmly into the holes; if they are loose, the screws will not grip properly, compromising the entire installation.
Always use a spirit level to verify that your drilling marks are perfectly horizontal before making any holes. Even a minor tilt of a few millimeters can cause round objects to roll off, put uneven stress on the mounting brackets, and look highly unprofessional. Once the brackets are screwed in tightly, place the shelf board on top and secure it to the brackets using short wood screws to prevent the board from sliding forward.
Before placing any valuable electronics, books, or glass decor on your newly installed shelves, perform a basic load test. Apply gentle, gradual downward pressure with your hands to check for any flexing, wobbling, or pulling away from the wall. If you notice the wall anchors shifting or the drywall flexing, remove the weight immediately and re-evaluate your mounting hardware.
Recognize your limits and know when to call a professional installer. If you encounter unexpected resistance while drilling—which could indicate steel reinforcing bars (rebar), electrical conduits, or water pipes—stop immediately. Additionally, if you are planning a large, floor-to-ceiling library wall or mounting shelves on delicate plaster walls in older heritage homes, hiring a qualified carpenter or contractor will ensure a safe, durable installation that protects your property.
Frequently Asked Questions (FAQ)
How do I clean and maintain wooden wall shelves?
To clean wooden wall shelves, dust them weekly with a dry, soft microfiber cloth to remove surface dust before it can mix with ambient humidity and form a sticky layer. Avoid using harsh chemical cleaners, bleach, or abrasive scrubbing pads, as these can strip the protective varnish, wax, or lacquer finish. If a deeper clean is necessary, wipe the wood with a slightly damp cloth dipped in a highly diluted mixture of mild dish soap and water, then immediately dry the surface with a clean towel. Always check the manufacturer’s care label to see if periodic application of a specialized wood conditioner or furniture wax is recommended to maintain moisture resistance in humid tropical climates.
Can I install floating shelves in a rented apartment?
Before installing floating shelves in a rented apartment, you must carefully review your lease agreement regarding wall modifications. Many landlords in the Philippines prohibit drilling deep holes into concrete or drywall, or they may deduct repair costs from your security deposit if the walls are not restored upon move-out. If drilling is permitted, ensure you use high-quality wall anchors and plan to patch the holes with wall putty or plaster filler and apply matching paint before you vacate the property. If drilling is strictly forbidden, consider damage-free alternatives such as freestanding ladder shelves, desk-mounted hutch organizers, or lightweight adhesive-backed ledge shelves designed solely for paper photos and cards.

Community discussion
Share your experience or ask a question. Comments are reviewed before publication.