
Installing a door hanging rack is an efficient way to maximize vertical storage space in compact living environments, such as apartments or condominiums. However, a hasty installation can quickly lead to unsightly scratches, deep dents, or even permanent structural damage to your door. The key to a secure, damage-free setup lies in selecting a mounting method that matches your specific door material, applying protective padding to contact points, and adhering to strict weight limits. By taking a few preventative measures, you can enjoy the organizational benefits of extra storage without compromising the integrity of your home’s woodwork or painted finishes.
Assess Your Door Material and Rack Compatibility
Before purchasing or mounting any door hanging rack, you must evaluate the door itself. Not all doors are constructed the same way, and their internal structures dictate how much weight they can support and which mounting methods are safe.
Identify the Door Material:
Products mentioned in this guide
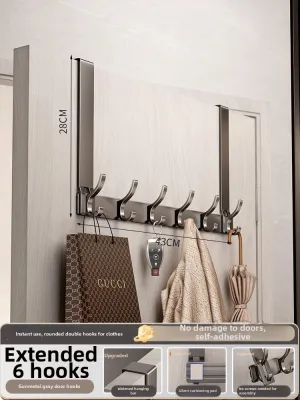
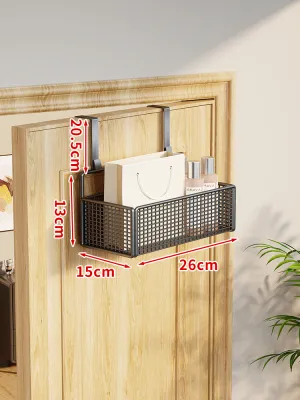
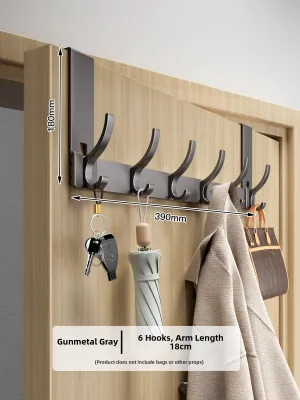
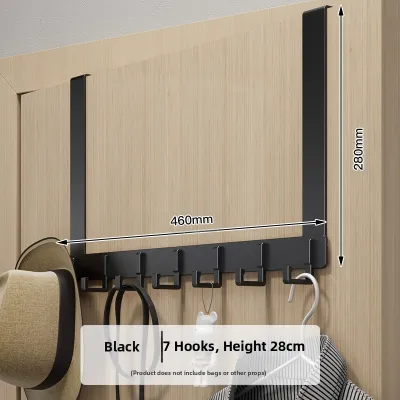
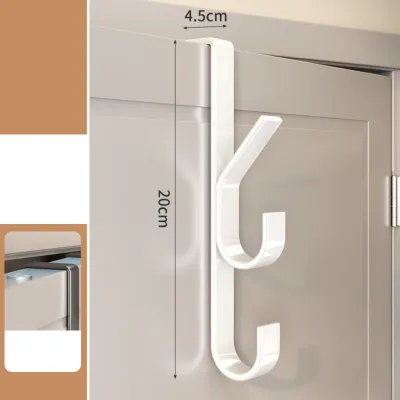
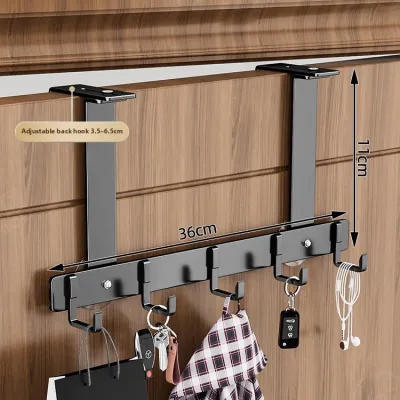
Prices are valid at publication and may change. Please refer to the product page for the latest price.
- Solid Wood Doors: These are heavy, sturdy, and highly durable. They can easily accommodate screw-mounted racks, over-the-door hooks, or heavy-duty adhesive systems because the dense wood provides excellent grip and structural integrity.
- Hollow-Core Doors: Extremely common for interior bedrooms and bathrooms, these doors consist of a thin outer veneer or plywood skin over a hollow cardboard core. They are lightweight and fragile. Screwing into the hollow center will fail as there is no solid wood to hold the threads, making over-the-door hooks or lightweight adhesives much safer alternatives.
- MDF (Medium-Density Fiberboard) Doors: These engineered wood doors are dense but susceptible to splitting if you drill without pilot holes. They also react poorly to extreme humidity if the protective paint or laminate finish is compromised.
- Metal Doors: Often used for main entryways or utility areas, metal doors are highly durable but difficult to drill into without specialized bits. Magnetic or heavy-duty over-the-door hooks are typically best here.
Measure Door Thickness and Top Clearance: Use a precise measuring tape to find the exact thickness of your door. Most standard interior doors measure between 35mm and 45mm. Over-the-door hooks are manufactured with specific bracket widths; using a bracket that is too wide causes the rack to tilt and rattle, while a bracket that is too narrow simply will not fit or will scrape the paint off the top edge.
Additionally, check the clearance gap between the top of the door and the frame. Place a small coin or a thin piece of cardboard on top of the door and close it. If the door jams or scrapes, you do not have enough clearance for metal hooks, and you should opt for an adhesive or screw-mounted rack instead.
Verify Weight Capacity and Swing Clearance: Always cross-reference the manufacturer-specified load limit of the rack with the items you intend to store. A rack meant for light hand towels or keys will quickly fail if loaded with heavy bags, wet umbrellas, or multiple pairs of jeans.
Finally, observe the door’s swing path. Ensure that the added depth of the rack and its stored items will not collide with adjacent walls, light switches, baseboards, or furniture when the door is swung fully open.
Gather the Right Tools and Protective Materials
Having the correct preparation tools and protective barriers on hand before you begin ensures a smooth installation process and prevents accidental surface damage.

Preparation and Cleaning Tools:
- Measuring Tape and Pencil: Essential for marking precise alignment and centering your rack.
- Spirit Level: Ensures your rack is perfectly horizontal, preventing items from sliding to one side and causing uneven weight distribution.
- Microfiber Cloth and Rubbing Alcohol: Used to thoroughly clean the door surface. Removing dust, oils, and moisture is critical for adhesive bonds, especially in humid tropical climates.
Protective Materials:
- Felt Pads or Foam Tape: Adhesive-backed felt or thin neoprene foam tape acts as a cushion between metal brackets and the door surface, absorbing vibrations and preventing scratches.
- Rubber Bumpers: Small, clear silicone or rubber bumpers placed on the back of the rack's lower frame will stop it from banging against the door when opened or closed.
Drilling and Fastening Tools (for Screw-Mounted Racks):
- Power Drill and Drill Bits: Select a wood drill bit that is slightly smaller than the core diameter of your mounting screws.
- Hand Screwdriver: Using a manual screwdriver instead of a power drill to tighten the final screws prevents overtightening, which can strip the wood or crush the door's outer skin.
Step-by-Step Installation for Your Door Hanging Rack
The actual installation process depends entirely on the mounting style of your chosen door hanging rack. Follow these targeted steps to ensure a secure fit that protects your door’s finish.
Over-the-Door Hooks (No Drilling)
- Clean the Top Edge: Wipe down the top surface of the door with a damp microfiber cloth to remove accumulated dust, grime, or loose paint. Let it dry completely.
- Apply Protective Padding: Before placing the metal brackets over the door, cut small strips of thin foam tape or felt padding. Apply these directly to the inside surfaces of the hooks—specifically where the metal will make contact with the top, front, and back faces of the door. This simple step prevents the metal from grinding against the door's paint or wood finish.
- Hang and Center the Rack: Carefully lower the hooks over the top of the door. Slide the rack horizontally until it is perfectly centered.
- Test the Door Operation: Slowly open and close the door several times. Listen for scraping sounds and feel for any resistance. If the door catches on the frame, check if the hooks are seated flat or if the door frame itself is misaligned.
- Avoid Forcing the Fit: Never force a tight hook over a door that is too thick. Forcing the bracket down will warp the metal, gouge the wood, or strip the paint, making the door difficult to close and causing permanent damage.
Adhesive-Mounted Racks
- Prep the Surface Thoroughly: Clean the exact area where the adhesive strips will stick using rubbing alcohol. In humid environments, moisture and invisible grease films can severely weaken adhesive bonds. Avoid using household glass cleaners or soapy water, as they often leave behind a slick residue. Let the surface air-dry completely.
- Mark the Placement: Hold the rack against the door, place a spirit level on top of it, and use a pencil to lightly mark the top and side boundaries of the mounting plates.
- Apply the Adhesive: Peel the backing from the adhesive strips (such as damage-free mounting tape designed for painted surfaces) and apply them to the back of the rack or directly to the door, as specified by the manufacturer. Press firmly along the entire length of the strip for at least 30 seconds to activate the pressure-sensitive adhesive.
- Allow the Bond to Cure: This is the most crucial step. Do not hang the rack body or place any items on the hooks immediately. Allow the adhesive to cure undisturbed for a full 24 hours (or the manufacturer's specified time) to establish a maximum strength bond.
- Avoid Heavy-Duty Construction Glues: Never use liquid nails, epoxy, or heavy-duty polyurethane construction adhesives on painted or hollow-core doors. These permanent adhesives bond chemically with the wood or paint, making it impossible to remove the rack in the future without tearing away the door's outer veneer or paint layers.
Screw-Mounted Racks
- Locate Solid Mounting Points: If you are installing a screw-mounted rack on a hollow-core door, you must anchor the screws into the solid outer frame of the door, known as the stiles (vertical edges) and rails (horizontal edges). The center of the door is hollow and cannot support screws under load. If mounting on a solid wood door, you can position the rack anywhere.
- Mark and Align: Hold the rack in your desired position, verify it is level, and use a pencil to mark the exact center of each screw hole.
- Drill Pilot Holes: Select a drill bit that matches the inner shaft of your screw (excluding the threads). Drill straight, shallow pilot holes into the marked spots. Pilot holes are essential because they guide the screw and prevent wood, MDF, or veneer from splitting or cracking under tension.
- Mount the Rack: Position the rack over the pilot holes and insert the screws. Use a manual screwdriver to tighten them until they are flush with the mounting bracket.
- Do Not Overtighten: Stop turning as soon as the screw head is snug against the bracket. Overtightening can strip the wood threads inside the door, rendering the mount useless, or crush the delicate surface of an MDF or hollow-core door. Note that drilling leaves permanent holes; if you are renting, verify with your landlord or check your lease agreement before proceeding.
Verify Stability and Prevent Long-Term Door Damage
Once your door hanging rack is installed, your job is not quite finished. Regular maintenance and careful usage are required to prevent gradual damage to both the door and its hinges over time.
Conduct a Gradual Weight Test: Do not immediately load the rack to its maximum capacity. Start by hanging a few lightweight items, such as empty tote bags or light jackets. Over the next few days, gradually add heavier items while closely monitoring the rack for signs of sagging, bowing, or adhesive peeling.
Check for Door Sag and Hinge Stress: Adding significant weight to a door puts extra stress on its hinges and the screws securing them to the wall frame. Over time, this extra load can cause the door to sag, making it drag along the floor or misalign with the latch. Periodically inspect the top hinge of your door. Look for gaps between the hinge plates, loose wood screws, or any visible stress on the door frame. If you notice sagging, reduce the weight on the rack immediately and tighten the hinge screws.
Prevent Rattling and Wall Impact: Every time a door is opened or closed, a hanging rack can swing or vibrate, causing it to repeatedly strike the door surface. To prevent this, ensure that the rubber or foam bumpers you installed are making firm contact with the door. Additionally, check that the fully opened door does not swing back so far that the rack strikes the adjacent wall. If necessary, install a floor-mounted door stopper or a soft wall bumper to limit the door’s travel and protect your drywall or plaster.
Distribute Weight Evenly: Avoid hanging all your heaviest bags or coats on one side of the rack. Uneven weight distribution twists the mounting brackets, puts concentrated stress on specific adhesive strips, and can cause the door itself to warp over time. Distribute items evenly across the entire width of the rack to balance the physical load.
Remove the Rack Safely Without Peeling Paint
Whether you are moving to a new home, redecorating, or restoring a rental property to its original condition, removing the door rack safely is just as important as installing it correctly.
Removing Over-the-Door Hooks: Simply unload all items from the rack, lift the brackets straight up and off the door, and set the rack aside. Use a damp microfiber cloth with a drop of mild dish soap to wipe away any accumulated dust or minor surface marks left behind by the protective padding.
Removing Adhesive-Mounted Racks: Never pull or rip an adhesive rack straight off the door, as this will tear away the paint and the top layer of wood or MDF. Instead, plug in a hairdryer and set it to a low-to-medium heat setting. Direct the warm air at the adhesive mounting plates for two to three minutes to soften the adhesive polymers.
Once the adhesive is warm and pliable, slide a length of dental floss or thin fishing line behind the mounting plate. Using a gentle sawing motion, work the line downward through the softened adhesive foam to separate the rack from the door without touching the paint.
Cleaning Up Adhesive Residue: If any sticky residue remains on the door, apply a small amount of rubbing alcohol or a mild, citrus-based adhesive remover to a clean microfiber cloth. Gently rub the residue in a circular motion until it lifts. Always test the adhesive remover on a small, hidden spot of the door first (such as the very top edge) to ensure it does not dull or dissolve the paint or clear finish.
Restoring Screw-Mounted Doors: Carefully back the screws out using a manual screwdriver to avoid stripping the wood further. To repair the permanent screw holes, purchase a small tub of color-matched wood filler or spackling compound. Press the filler into the holes using a putty knife, wipe away the excess so it sits flush with the door surface, and allow it to dry completely according to the manufacturer’s instructions. Once dry, lightly sand the area with fine-grit sandpaper and touch it up with matching paint or varnish.
Frequently Asked Questions (FAQ)
Can I install a door hanging rack on a hollow-core door?
Yes, you can safely install a door hanging rack on a hollow-core door, but you must choose your mounting method carefully. Over-the-door hooks and lightweight, damage-free adhesive strips are the safest options because they do not penetrate the door’s thin outer skin. If you must use screws, they should only be drilled into the solid wood stiles (vertical edges) or rails (horizontal edges) of the door frame. Screwing directly into the hollow center of the door will fail, as the thin panel cannot support the weight and the screws will quickly pull out, leaving large, torn holes.
Will an over-the-door rack damage the door frame?
An over-the-door rack can damage the door frame if there is insufficient clearance or if the metal brackets lack protective padding. If the gap between the top of the door and the frame is too narrow, the metal brackets will scrape against the frame every time the door is opened or closed, stripping the paint and gouging the wood. To prevent this, always measure your door clearance beforehand and apply adhesive-backed felt pads or foam tape to the inside of the brackets to act as a protective barrier.
How much weight can a typical door hanging rack hold?
The weight capacity of a door hanging rack varies significantly depending on its construction, mounting method, and the door’s material. Lightweight adhesive-mounted racks typically support between 2 kg and 5 kg, while sturdy over-the-door metal racks can often hold 10 kg to 15 kg if the weight is distributed evenly. Screw-mounted racks on solid wood doors can support even heavier loads. Always check the manufacturer’s specified weight limit on the product packaging and avoid overloading the rack to prevent warping the door or pulling it off its hinges.

Community discussion
Share your experience or ask a question. Comments are reviewed before publication.