
Installing a wall-mounted baseball cap holder securely without ruining your paint or plaster comes down to matching your mounting hardware to the specific wall material in your home. Whether you live in a high-rise condominium in Manila with solid concrete walls or a suburban house with drywall partitions, choosing the correct anchor and respecting the manufacturer’s weight limits will keep your caps organized and your walls pristine. Before driving any screws or peeling any adhesive backings, you must identify what lies behind your paint and plan your layout carefully.
To determine your wall type, start with a simple tap-and-feel test. Drywall and plaster walls sound hollow when tapped and feel slightly warm to the touch, whereas concrete, brick, or masonry walls sound completely solid and feel cold. Wood paneling or solid wood walls will have a distinct grain pattern, a slight natural texture, and a firm, resonant sound when tapped. Knowing this material is crucial because a fastener designed for wood will quickly slip out of drywall, while attempting to drive a standard screw directly into concrete will strip the thread and crack the surrounding wall surface.
Next, unbox your baseball cap holder and inspect the included hardware. Manufacturers often package their products with standard plastic wall plugs and screws, but these default accessories are not always suitable for every wall type. Check the product manual or packaging for the specified weight capacity and any installation restrictions. You must also measure the physical dimensions of the holder, including its depth when fully loaded with caps, to ensure it will not obstruct doorways, hallways, or active pathways in your room.
Products mentioned in this guide
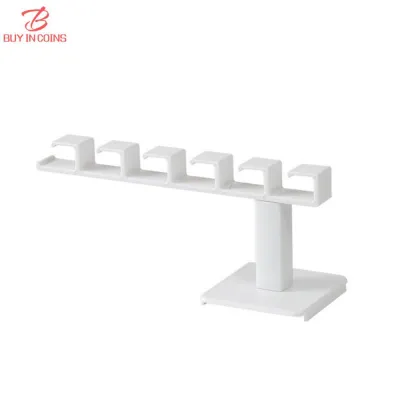
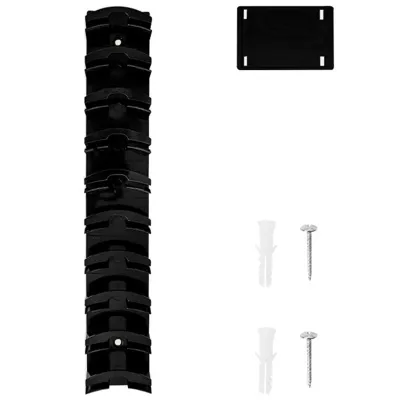
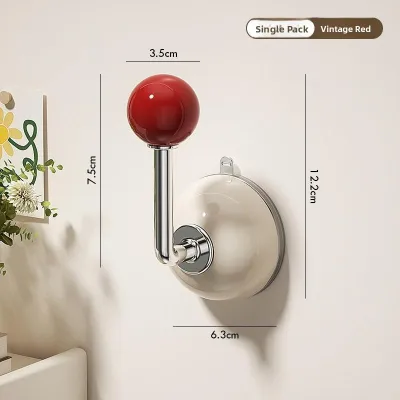
Prices are valid at publication and may change. Please refer to the product page for the latest price.
Choose the Right Mounting Method for Your Wall
Using the wrong fastener is the primary cause of wall damage and structural failure when hanging storage fixtures. For instance, driving a standard nail or a bare screw directly into drywall creates a loose, crumbling hole that widens under the weight of your caps, eventually causing the entire holder to rip out and tear the wall surface. To prevent this, you must match your anchors to the specific substrate of your wall. Let us examine how to handle the three most common wall categories found in residential spaces.
Drywall and Plaster
Drywall and plaster are relatively soft, hollow materials that require specialized support to hold weight. Whenever possible, use a stud finder to locate the wooden or metal studs behind the drywall, as securing your baseball cap holder directly into a stud provides the strongest possible hold without needing anchors. If a stud is not positioned where you want to mount your holder, you must use hollow-wall fasteners such as threaded drywall anchors or toggle bolts. These anchors expand or grip behind the drywall sheet, distributing the weight across a larger surface area to prevent the plaster from cracking or tearing.
Avoid the temptation to hang a multi-cap rack using standard nails or screws driven directly into bare drywall. Without an anchor, the constant pulling and tugging as you grab or hang your caps will quickly loosen the fastener, leaving an unsightly, oversized hole. If you prefer a non-drilling option for drywall, heavy-duty adhesive strips can work, but only under specific conditions. The wall must be completely clean, dry, and free of dust, and you must accept the risk that removing these adhesives in humid tropical climates can sometimes peel away the top layer of paint if not done with extreme care.
Concrete and Masonry
Concrete, hollow blocks, and brick walls are incredibly dense and require mechanical anchoring to hold any fixture. To install a baseball cap holder on these surfaces, you cannot use standard hand tools; you must use a hammer drill equipped with a masonry drill bit. The hammer action of the drill pulverizes the tough concrete, creating a clean, round hole without cracking or shattering the surrounding wall area.
Once the hole is drilled to the exact depth and diameter specified by your hardware, insert a masonry anchor or a sleeve anchor. These anchors expand tightly against the inner walls of the drilled hole as the screw is tightened, creating a friction lock that can support significant weight. Do not attempt to use adhesive strips or double-sided tape on bare, porous, or dusty concrete and masonry walls. The fine dust on these surfaces prevents the adhesive from bonding properly, leading to a sudden failure where the holder falls, often taking a chunk of loose paint or plaster with it.
Wood Paneling and Solid Wood
Solid wood walls and wood paneling offer an excellent, sturdy base for mounting hardware, but they require careful preparation to avoid cosmetic damage. Before driving any screws into wood, always pre-drill pilot holes using a drill bit that is slightly smaller than the inner shaft of your screw. This pilot hole guides the screw straight into the wood and relieves the internal pressure, preventing the wood grain from splitting or cracking along the line of insertion.
If you are mounting your baseball cap holder onto thin wood paneling, check if there is a hollow cavity directly behind the wood sheet. Thin paneling may not have enough thickness to hold a standard wood screw securely under load, meaning you might need to use specialized hollow-wall anchors that grip the back of the panel. When securing your screws, use manual screwdrivers rather than high-speed power drivers, and avoid over-tightening. Excessive force can easily strip the wooden threads inside the pilot hole or dent the polished finish of your wood panel.
Step-by-Step Installation Guide
Achieving a clean, level, and damage-free installation requires a methodical approach. Begin by holding your baseball cap holder against the wall at your desired height. Use a tape measure to check the distance from the floor and adjacent walls, ensuring the placement is balanced and accessible. Place a spirit level on top of the holder to make sure it sits perfectly horizontal, then use a pencil to mark the exact drilling or mounting points through the screw holes of the fixture.

Next, prepare the wall surface based on your chosen mounting method. If you are using adhesive strips, wipe the marked area with rubbing alcohol to remove any oils, dust, or moisture, and let it dry completely. If you are drilling, select the correct drill bit size matching your wall anchors. Hold your drill perfectly perpendicular to the wall and drill steady, clean holes directly into your pencil marks. Vacuum away any falling plaster or concrete dust immediately to keep the workspace clean and prevent the dust from settling on your floors or baseboards.
Once the holes are prepared, insert your wall anchors until they sit flush with the wall surface. Align the mounting holes of your baseball cap holder with the anchors, insert the screws, and tighten them firmly. Before you begin hanging your caps, gently wiggle the holder to check for any wobble, play, or instability. If the fixture moves, tighten the screws slightly more, ensuring you do not over-torque them.
Always prioritize safety and stop the installation immediately if you encounter unexpected resistance. If the wall material crumbles excessively while drilling, if your drill bit hits a hard, metallic obstruction (which could indicate a water pipe or electrical conduit), or if the hardware fails to sit flush against the wall, do not force the installation. Pause your work and consult a qualified professional builder or handyman to assess the wall structure before proceeding.
Damage-Free Alternatives and Safe Removal
For renters or those who prefer not to drill into their walls, damage-free adhesive alternatives offer a practical solution. Heavy-duty adhesive hooks or specialized mounting strips can support a lightweight baseball cap holder easily, provided you follow the manufacturer’s instructions to the letter. Always check the weight limits on the adhesive packaging; most standard cap organizers weigh very little, but a collection of multiple heavy wool caps can add up. Ensure your wall surface is compatible, as most adhesives do not bond well to textured plaster, wallpaper, or highly porous paint finishes.
When it is time to move out or rearrange your room, removing these adhesives safely is crucial to avoid tearing your paint. Never pull the adhesive strip straight outward from the wall, as this concentrated force will rip the paint and drywall paper. Instead, apply gentle heat to the adhesive using a hair dryer for a minute to soften the chemical bond. Once warm, slowly stretch the adhesive strip downward, parallel to the wall surface, as directed by the manufacturer, or use a specialized adhesive solvent to dissolve the residue before gently peeling the hook away.
If you used screws and anchors and need to restore the wall to its original state, the repair process is straightforward. Start by gently pulling the plastic anchors out of the wall using needle-nose pliers, or use a utility knife to carefully slice off the raised collar of the anchor so it sits slightly below the wall surface. Fill the remaining hole with a small amount of wall spackle or patching compound, smoothing it flat with a putty knife. Once the compound dries completely, sand the area lightly with fine-grit sandpaper until it is flush with the surrounding wall, then apply a quick touch-up coat of matching paint.
Frequently Asked Questions (FAQ)
How many caps can a standard wall-mounted holder support?
The number of caps a holder can support depends entirely on the design of the fixture, its material, and the strength of the mounting method rather than a single universal standard. A lightweight plastic adhesive hook might only be rated to hold two or three caps safely, whereas a solid wood or metal rack secured into wall studs can easily support dozens of hats. Always check the product packaging or the manufacturer’s manual to verify the exact maximum weight limit. To prevent damage, distribute the weight of your caps evenly across the entire holder, and avoid hanging heavier items like wet caps, heavy winter beanies, or bags on hooks designed solely for lightweight baseball caps.
Can I install a cap holder on tiled or glass surfaces?
Yes, but mechanical mounting is highly discouraged for DIY beginners on these fragile surfaces. Drilling into ceramic tile or glass requires specialized diamond-tipped or carbide drill bits, constant water lubrication to prevent overheating, and an extremely steady hand to avoid cracking the material. Instead of drilling, the safest and most effective method for tiled or glass walls is using heavy-duty suction cups or specialized waterproof adhesive strips designed for non-porous surfaces. Ensure the tile or glass is thoroughly cleaned with rubbing alcohol to remove any soap scum or grease before application, and avoid placing adhesives directly over grout lines, as this can prevent a proper seal and potentially damage the grout upon removal.

Community discussion
Share your experience or ask a question. Comments are reviewed before publication.