
Mounting a hats and caps organizer on your wall is an excellent way to declutter your living space, preserve the shape of your headwear, and turn your collection into a functional display. However, a secure installation depends entirely on matching your mounting hardware and techniques to the specific type of wall in your home. Whether you are dealing with solid concrete, hollow drywall, or thin wood paneling, using the wrong approach can lead to sagging racks, damaged walls, or a collapsed display. By understanding the structural characteristics of your wall and following a systematic installation process, you can ensure your organizer remains firmly in place for years to come.
Assess Your Wall Type and Organizer Weight
In many homes, especially in tropical climates like the Philippines, wall construction varies significantly between rooms. Exterior walls and main partitions are typically made of solid concrete or plastered concrete hollow blocks. You can identify these by tapping on them; they will feel cold to the touch, completely solid, and produce a dull, flat sound. Interior partitions, particularly in newer condominiums or renovated spaces, often consist of gypsum drywall, which sounds hollow when tapped and yields slightly under firm pressure. Older homes or light-filled lofts may feature wood panels or plywood partitions, which also sound hollow but have a distinct wood grain texture and offer slightly more resistance than drywall.
Before purchasing or installing your hats and caps organizer, you must calculate the total load the wall will need to support. This includes the dead weight of the organizer itself—which can be substantial if made of solid wood or wrought iron—plus the live weight of your entire hat collection. While a single baseball cap or straw fedora is lightweight, a dense collection of twenty or thirty caps, especially when damp from tropical humidity or outdoor rain, can exert significant downward leverage on the mounting screws. Estimate this total weight conservatively and compare it against the load limits of your chosen wall anchors.
Products mentioned in this guide
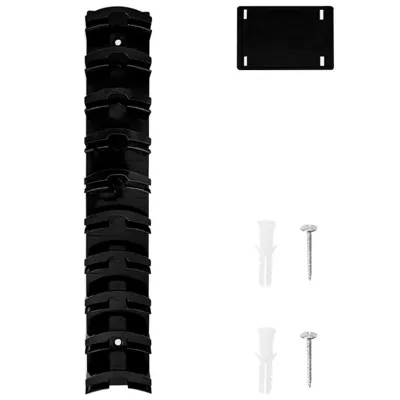
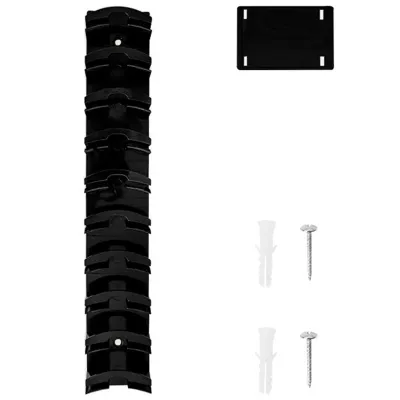
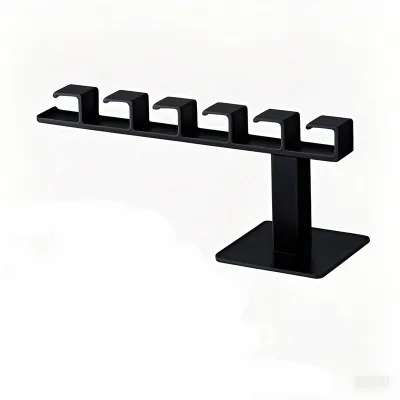

Prices are valid at publication and may change. Please refer to the product page for the latest price.
Always consult the manufacturer’s installation manual before beginning. The manual will specify the recommended mounting points, screw sizes, and whether the included hardware is designed for your specific wall type. Many imported organizers ship with basic plastic anchors that are only suitable for drywall or light masonry; if your wall type is unsupported by the provided hardware, or if the instructions are unclear, stop and acquire the correct specialized anchors before proceeding.
Gather the Right Tools and Hardware
Having the correct tools on hand prevents damage to both your organizer and your walls. You will need a reliable power drill, a spirit level to ensure the rack sits perfectly horizontal, a measuring tape, and a pencil for marking. For concrete walls, a hammer drill is highly recommended, paired with a carbide-tipped masonry drill bit. For drywall or wood panels, a standard rotary drill equipped with high-speed steel or wood spade bits will suffice.

Selecting the right wall anchor is the single most critical factor in a successful installation. For concrete or masonry, plastic expansion plugs or heavy-duty sleeve anchors are necessary to grip the dense material. For drywall, standard plastic plugs often pull out under downward tension; instead, opt for threaded self-drilling drywall anchors or metal toggle bolts, which expand behind the gypsum board to distribute weight. For solid wood panels or studs, wall anchors are generally unnecessary, as wood screws can bite directly into the material to provide a highly secure hold.
Safety should always be your top priority when drilling into residential walls. Wear safety glasses to protect your eyes from flying concrete dust or wood splinters, and use a dust mask to avoid inhaling fine particulates. Before pulling the trigger on your drill, use a stud finder with a live-wire detection feature to ensure you are not drilling into hidden electrical conduits or water pipes, which are commonly embedded in concrete walls or run behind drywall partitions.
Step-by-Step Installation for Concrete Walls
Begin by holding the hats and caps organizer against the concrete wall at your desired height. Place a spirit level on top of the organizer to ensure it is perfectly level, then use a pencil to mark the exact center of each mounting hole onto the wall. Double-check your marks by measuring the distance between them and comparing it to the mounting holes on the organizer itself to prevent any alignment errors.
Fit your hammer drill with a masonry bit that matches the exact diameter of your concrete anchors. Set the drill to its hammer function, place the tip of the bit directly on your pencil mark, and apply firm, steady pressure. Drill slightly deeper than the length of the anchor to allow room for any residual dust, using a piece of masking tape wrapped around the drill bit as a temporary depth guide. Do not force the drill or run it at maximum speed continuously, as this can overheat and dull the masonry bit; instead, drill in short bursts and let the tool do the work.
Once the holes are drilled, clear out the concrete dust using a hand pump or a vacuum cleaner to ensure a clean grip. Insert the plastic masonry anchors into the holes, tapping them gently with a hammer until they sit completely flush with the plastered surface. Align the organizer’s mounting holes with the installed anchors, insert the screws, and tighten them securely using a screwdriver or a drill on a low torque setting. If the concrete crumbles during drilling or the anchor spins freely without tightening, stop immediately, as this indicates a failed anchor that will not support the weight of your hats.
Step-by-Step Installation for Drywall and Wood Panels
When mounting a hats and caps organizer on drywall or thin wood panels, securing the hardware directly into the wooden or metal studs behind the wall provides the strongest possible support. Use a stud finder to locate these vertical framing members and mark their edges with a pencil. If the mounting holes on your organizer align with the studs, you can screw directly into them using standard wood screws, bypassing the need for hollow-wall anchors entirely.
If the organizer’s mounting points do not align with the studs, you must use specialized hollow-wall anchors to prevent the organizer from tearing out of the soft drywall. For medium-weight organizers, threaded plastic drywall anchors work well, while heavy-duty organizers require toggle bolts. To install a toggle bolt, drill a hole large enough for the folded metal wings of the bolt to pass through; once pushed through the drywall, the wings spring open on the backside, creating a wide, secure anchor point when the bolt is tightened.
When drilling into drywall or wood panels, adjust your drill speed and pressure to match the material. Use a standard twist drill bit and apply light, steady pressure to avoid cracking the fragile gypsum core of drywall or splintering the face of wood paneling. If you encounter unexpected resistance or if the wall material feels soft, crumbly, or structurally compromised, stop the installation and consult a professional carpenter to assess the wall’s integrity.
Final Checks and Load Testing
After tightening all the screws, conduct a thorough visual and physical inspection of the installed organizer. Check that the backplate or mounting brackets sit completely flush against the wall surface with no visible gaps or tilting. Gently wiggle the organizer with your hand; there should be absolutely no play, wobbling, or movement at the mounting points.
Before hanging your entire collection of hats and caps, perform a gradual load test to verify the holding power of your installation. Start by placing one or two lightweight caps on the organizer and observe the wall brackets for any signs of movement. Gradually add more hats over the course of a few hours, slowly increasing the weight until the organizer is fully loaded.
Keep a close eye out for warning signs of structural failure during and immediately after the load test. These signs include fine cracks forming in the drywall around the anchors, screws pulling away from the wall, or the organizer sagging downward. If you notice any of these issues, remove the hats immediately to prevent further damage to your wall or your headwear, and re-evaluate your choice of anchors or mounting location.
Frequently Asked Questions (FAQ)
Can I install a hats and caps organizer without drilling?
Yes, lightweight hats and caps organizers can sometimes be installed without drilling by using heavy-duty adhesive strips or utility hooks. However, this method is strictly limited to very light organizers, such as plastic racks or fabric hanging straps, and should not be used for heavy wooden or metal shelves. To ensure a strong bond, you must thoroughly clean the wall surface with rubbing alcohol to remove dust, grease, and tropical humidity residue before applying the adhesive. Keep in mind that adhesive strips carry a high risk of peeling away paint, plaster, or wallpaper when removed, and they may fail prematurely in hot, humid environments.
How do I repair the wall if I need to move the organizer?
If you decide to relocate your organizer, repairing the leftover holes is a straightforward process that varies by wall type. For drywall or concrete walls, scrape away any loose debris around the hole, then fill it with a high-quality spackling compound or wall putty using a putty knife. For wood panels, use a color-matched wood filler to blend the patch with the surrounding grain. Once the filler is completely dry, sand the area smooth with fine-grit sandpaper, apply a coat of primer, and repaint the spot to match the rest of the wall. For extensive structural damage or large holes left by failed toggle bolts, consulting a professional painter or handyman may be necessary to achieve a seamless finish.

Community discussion
Share your experience or ask a question. Comments are reviewed before publication.