
Installing a wall-mounted shelves rack organizer for clothes is one of the most effective ways to maximize floor space, declutter your bedroom, and create a highly functional wardrobe system. Unlike bulky, freestanding wardrobes that take up valuable square footage, a wall-mounted system utilizes vertical space, making it ideal for compact rooms, walk-in closets, or studio apartments. In tropical climates like the Philippines, where indoor humidity can easily lead to musty odors and mold on fabrics, open wall shelves also offer the distinct advantage of superior air circulation. However, a successful setup requires careful preparation, precise installation, and strategic organization to ensure the structure remains safe and stable under the weight of your wardrobe.
By taking the time to understand your wall structure, gather the correct tools, and follow a systematic mounting process, you can build a storage solution that is both visually appealing and structurally sound. This guide will walk you through every stage of the process, from initial spatial planning to the final styling of your garments, ensuring your new organizer serves your home reliably for years to come.
Assess Your Wall and Space Before Installation
Before purchasing or mounting a shelves rack organizer for clothes, you must thoroughly evaluate your physical space and wall conditions. Begin by measuring the height, width, and depth of the target wall area. Keep in mind that standard clothes hangers require at least 30 to 45 centimeters of depth to hang freely without rubbing against the wall or blocking walkways. You must also measure nearby door swings, window frames, and light fixtures to ensure the shelves do not obstruct daily movement or access to other furniture.
Products mentioned in this guide
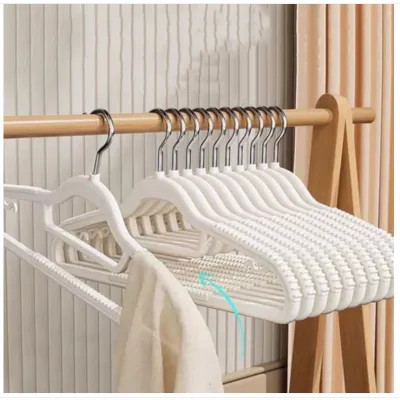
Prices are valid at publication and may change. Please refer to the product page for the latest price.
Identifying your wall material is the single most critical factor for a safe installation. In many residential homes, walls are constructed from solid concrete or concrete hollow blocks (CHB), while interior partitions in modern condominiums or renovated spaces often consist of drywall or fiber cement boards mounted on metal or wooden studs. Concrete walls offer excellent load-bearing capacity but require specialized masonry drill bits and expansion anchors. Drywall partitions, on the other hand, are much weaker and require you to locate the structural studs behind the board or use heavy-duty hollow-wall fasteners.
Finally, check the manufacturer’s specifications for the maximum weight capacity of the shelf organizer. Compare this limit against an estimated weight of the clothing you plan to store. A stack of folded denim, heavy jackets, and storage boxes can easily weigh dozens of kilograms, so ensuring your wall type can support the intended load is essential to prevent structural failure or damage to your home.
Gather the Right Tools and Hardware
Having the correct tools on hand before you begin will prevent unnecessary interruptions and ensure a precise, professional-grade installation. For measuring and marking, you will need a reliable tape measure, a pencil, and a spirit level. A spirit level is absolutely indispensable; even a slight tilt in your shelving brackets can cause clothes to slide, put uneven stress on fasteners, and ruin the visual alignment of the entire system.

For the physical installation, prepare a power drill. If you are drilling into concrete or brick, a drill with a hammer function is highly recommended, alongside high-quality masonry drill bits that match the size of your wall anchors. For drywall or wood partitions, standard wood or metal drill bits are sufficient. You will also need a manual screwdriver or a power driver bit to secure the screws into place without stripping the heads.
Do not rely solely on the generic hardware packaged with your shelf organizer unless you are certain it matches your specific wall type. For concrete walls, use high-quality plastic or metal expansion plugs. For drywall, invest in heavy-duty toggle bolts or threaded drywall anchors. Additionally, wearing safety goggles and a dust mask is highly recommended, especially when drilling overhead into concrete, which generates a significant amount of fine dust.
Step-by-Step Installation Process
To begin the installation, position the main vertical standards, tracks, or mounting brackets against the wall at your desired height. Place your spirit level against the bracket to ensure it is perfectly vertical, then use a pencil to mark the exact center of each screw hole onto the wall. If your organizer uses a top horizontal track system, level and mark this track first, as all vertical standards will hang from it.
Next, prepare your power drill with the correct bit size. Hold the drill completely perpendicular to the wall to prevent the hole from angling, which can weaken the anchor’s grip. Drill to the depth specified by your anchor manufacturer, which is typically slightly longer than the anchor itself. Once the holes are drilled, use a vacuum cleaner, a hand blower, or a simple straw to clear out all concrete dust or drywall debris from inside the holes, ensuring a clean, high-friction fit for the hardware.
Insert your wall anchors into the clean holes. For concrete walls, tap the plastic expansion plugs gently with a hammer until they sit perfectly flush with the wall surface. If you are working with drywall and using toggle bolts, feed the bolt through the bracket hole first, thread the spring-loaded wing onto the bolt, compress the wings, and push them completely through the drilled hole until you hear them snap open behind the drywall.
Align your brackets or tracks over the installed anchors and begin driving the screws. Start by partially tightening the top screw to hold the bracket in place, then insert and tighten the remaining screws. Once all screws are in, use your screwdriver to tighten them firmly, but avoid over-tightening, which can strip the plastic anchors or crack drywall. Give each bracket a firm tug to verify that there is absolutely no movement or play against the wall.
With the main support structure securely mounted, you can now attach the individual shelves, hanging rods, and wire baskets. Most modular systems feature brackets that click or lock into vertical slots. Ensure that each shelf is fully seated in its slots and that any safety clips or locking tabs are completely engaged to prevent accidental dislodging when you reach for your clothes.
Verify Stability and Distribute Weight Safely
Once the physical assembly is complete, you must verify the structural integrity of the system before loading it with your wardrobe. Apply a gradual, firm downward pressure with your hands on different sections of the shelves and hanging rods. Listen closely for any creaking sounds and watch the wall connection points for any signs of pulling away or flexing. If you notice any movement, stop immediately and check if the anchors are slipping or if the screws need further tightening.
When you begin placing your clothes on the organizer, practice smart weight distribution to minimize structural stress. Place your heaviest items, such as thick denim, winter coats, heavy storage boxes, or folded bedding, on the lower shelves or as close to the vertical wall brackets as possible. This positioning keeps the center of gravity low and reduces the leverage force pulling outward on the top wall anchors.
Avoid overloading the outer edges or cantilevered ends of the shelves, as this can cause the shelving material to warp or twist over time. If your shelf organizer includes specialized anti-tip hardware, wall straps, or safety brackets, ensure they are fully engaged and locked. Keeping the weight balanced across the entire width of the organizer will prolong its lifespan and guarantee a safe home environment.
Arrange and Organize Your Clothes Efficiently
An organized shelving system not only looks beautiful but also streamlines your daily routine. Start by categorizing your clothing by type, such as t-shirts, trousers, dresses, and activewear. Within each category, arrange items by color or frequency of use. In the humid climate of the Philippines, it is highly beneficial to leave a small amount of breathing room between hanging garments; packing clothes too tightly restricts airflow, which can trap moisture and lead to mold growth or musty odors.
For open shelves, folded clothes can easily become messy if left loose. Use breathable fabric bins, woven rattan baskets, or clear plastic dividers to keep folded items like t-shirts, shorts, and knitwear neatly stacked. Baskets are also excellent for containing smaller, loose items such as socks, underwear, belts, and accessories, keeping them out of sight while maintaining easy access.
Optimize your vertical space by dividing the organizer into functional zones. Reserve the highest, hardest-to-reach shelves for lightweight storage boxes containing seasonal wear, travel gear, or items you rarely use. Keep your daily essentials at eye level for quick access during busy mornings. The open space beneath the lowest shelf is ideal for organizing shoes on a low rack, placing a laundry hamper, or storing heavier plastic bins.
Maintain and Inspect Your Shelf Regularly
Regular maintenance is essential to keep your wall-mounted clothes organizer safe and functional over the years. Every few months, perform a quick visual inspection of the entire system. Check the mounting screws and brackets to ensure they have not loosened due to the daily vibrations of hanging and removing clothes. If you detect any slight play, use a manual screwdriver to gently retighten the fasteners.
Clean the shelf surfaces periodically to prevent dust buildup, which can transfer to your clean clothes. Follow the manufacturer’s care instructions for your specific material; generally, a soft, slightly damp microfiber cloth is sufficient for wiping down metal, laminate, or finished wood shelves. Avoid using harsh chemical cleaners, abrasive scrubbing pads, or excessive water, as these can damage protective coatings, cause wood to swell, or promote rust on metal components in humid environments.
Finally, monitor the shelves for any signs of physical wear, such as bowing in the middle of wooden panels or bending in metal wire racks. If you observe any sagging or deformation, it is a clear sign that the shelf is overloaded. Immediately remove some of the weight, redistribute the remaining items closer to the support brackets, and consider adding an extra support bracket if the bowing persists.
Frequently Asked Questions (FAQ)
Can I install a wall-mounted shelf on drywall?
Yes, you can install a wall-mounted shelf on drywall, but you must use the correct hardware and techniques to ensure safety. Standard plastic wall plugs are not sufficient for supporting the weight of clothes on drywall. Instead, you should locate the wooden or metal studs behind the drywall using a stud finder and screw your main brackets directly into them. If the bracket spacing does not align with your studs, you must use heavy-duty toggle bolts or hollow-wall anchors rated for the weight of your wardrobe, and keep the overall load lighter than you would on a solid concrete wall.
How do I prevent folded clothes from falling off open shelves?
To keep folded clothes secure on open shelves, you can use physical barriers such as clip-on shelf dividers, which slide onto the edge of the shelf to create neat, vertical compartments. Another highly effective method is to store folded garments inside open-front storage bins or wire baskets; these keep your clothes contained and upright while still allowing you to see and access them easily. Additionally, avoid stacking folded clothes too high, as shorter stacks are inherently more stable and less likely to topple over when you retrieve an item.

Community discussion
Share your experience or ask a question. Comments are reviewed before publication.