
Moving your entire household using a cargo container is one of the most efficient ways to handle a major relocation, especially when crossing islands or moving long distances across the Philippines. However, a successful move relies entirely on how well you utilize the three-dimensional space inside that steel box. Simply piling boxes inside without a plan leads to damaged furniture, wasted space, and an incredibly stressful unloading process.
To maximize every cubic meter, you must approach the packing process with a clear strategy that balances weight distribution, structural stability, and accessibility. By treating the container as a structured, vertical puzzle, you can protect your investments and make the transition to your new home seamless. This guide walks you through the essential steps of preparing, packing, and securing your belongings inside a cargo container to ensure everything arrives intact.
Assess Your Cargo Container and Inventory
Before you tape a single box, you need to understand the physical limits of your cargo container. Standard containers typically come in 20-foot and 40-foot lengths, but you must obtain the exact internal dimensions from your moving coordinator or shipping line. Pay close attention to the door height and width, which are often slightly smaller than the internal cavity, and note any internal structural features like tie-down rings along the floor and ceiling.
Products mentioned in this guide

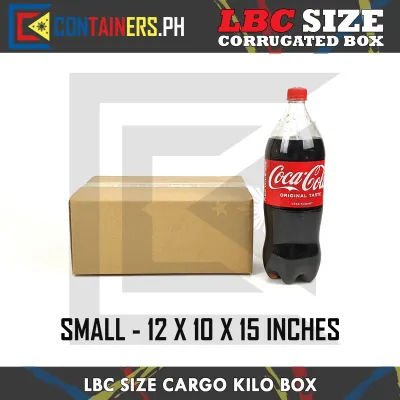

Prices are valid at publication and may change. Please refer to the product page for the latest price.
Once you know your spatial limits, conduct a thorough inventory of your household items. Group your belongings into clear categories based on weight, fragility, and their destination rooms in the new house. Heavy appliances, solid wood dining tables, and large sofas will form the base of your loading plan, while lightweight boxes, bedding, and fragile glassware will sit at the top.
This is also the time to identify which furniture pieces require disassembly. Large bed frames, wardrobe cabinets, and dining table legs should be taken apart according to their manufacturer instructions to save space. Keep all screws, bolts, and brackets in clearly labeled plastic bags taped securely to the corresponding furniture parts, or store them all in a dedicated parts box that stays with you during the move.
Gather Essential Packing and Securing Materials
Maximizing space inside a cargo container requires uniform packing materials. When you use random, mismatched boxes sourced from local grocery stores, stacking them vertically becomes a dangerous game of balance. Instead, invest in heavy-duty, standardized moving boxes of uniform sizes. Standard medium and large boxes stack predictably, allowing you to build stable vertical columns that reach all the way to the container ceiling without collapsing.

Protection is just as important as organization, especially in tropical climates where humidity is high and sudden downpours are common during transit. Gather plenty of high-quality packing tape, bubble wrap, stretch film, and thick furniture blankets. Wrapping wooden furniture in breathable moving blankets and securing them with stretch wrap protects the finish from scratches, dust, and friction.
Additionally, you will need heavy-duty ratchet straps, tie-down ropes, or cargo nets to anchor your items. Do not rely on simple plastic strings or weak ropes; the vibrations of a container ship or a flatbed truck traversing uneven roads require industrial-grade securing tools. Keep a basic toolkit—including screwdrivers, an adjustable wrench, and a utility knife—easily accessible so you can handle last-minute adjustments or open boxes immediately upon arrival.
Execute a Systematic Loading Strategy
The golden rule of packing a cargo container is to load from back to front, and from bottom to top, building solid vertical walls as you progress. Start at the very back of the container, which is the side opposite the doors. Place your heaviest, sturdiest items here to form a stable foundation. Large appliances like washing machines, refrigerators, and heavy wooden cabinets should be positioned flat against the back wall, ensuring weight is distributed evenly across the width of the container.
Once the heavy base is established, begin stacking medium-weight boxes directly on top of them. Always place heavier boxes at the bottom of a stack and lighter, more fragile boxes on top. As you build these vertical tiers, fill every single gap. Wasted space is the enemy of a secure load; empty pockets allow items to shift and collide when the container is in motion. Use soft, non-fragile items like pillows, rolled-up sleeping bags, stuffed toys, or extra blankets wrapped in plastic bags to plug any small gaps between furniture and boxes.
When loading long items like mattresses, sofas, or large table tops, place them vertically along the side walls of the container. This saves significant floor space and provides a flat surface against which you can stack other boxes. Make sure to place protective cardboard or furniture pads between these items and the metal walls of the container to prevent friction damage during transit.
Finally, reserve the space closest to the container doors for your essential, first-day items. This includes basic kitchen utensils, toiletries, a change of clothes, cleaning supplies, and your primary tool kit. When you arrive at your new home, you will not want to dig through twenty feet of boxes just to find a broom or a clean towel. Having these items immediately accessible makes the first night in your new space comfortable and organized.
Secure the Load and Prevent Transit Damage
A tightly packed container can still suffer from shifting during transit, especially during sea voyages or long road trips across provincial highways. To prevent a domino effect inside the container, you must secure the load in sections. Every time you complete a vertical wall of boxes and furniture—roughly every five to six feet of depth—use heavy-duty ratchet straps to anchor the section to the container’s internal tie-down rings. This creates a series of independent, secure bulkheads that cannot slide forward or backward.
If you find yourself with large empty spaces that you cannot fill with household goods, do not leave them open. Use cargo dunnage bags, heavy-duty cardboard dividers, or empty wooden pallets stood on end to bridge the gaps. These physical barriers prevent large furniture pieces from tipping over sideways when the transport vehicle makes sharp turns.
Before you close and lock the container doors, perform a final visual inspection. Check that no boxes are leaning precariously against the door frame, as they could fall out and cause injury when the doors are opened at your destination. Ensure there is a clear clearance of at least a few inches between the final row of items and the door seals. If necessary, install a final cargo net or cross-strap system across the door opening to keep everything firmly in place.
Plan for Efficient Unloading at Your New Home
An organized packing process pays massive dividends when you finally arrive at your destination. To make the unloading process as smooth as possible, label every single box on multiple sides with its designated room and a brief list of its contents. This allows your moving team or helpers to carry boxes directly to their correct locations without constantly asking for directions.
Create a master inventory list that corresponds to the labeled boxes. For instance, a specific kitchen box might contain pots and pans. Keep a digital copy of this list on your phone and print a physical copy to check off items as they are carried out of the container. If you have packed complex furniture assemblies, draw a simple map or layout diagram of the container to help the unloading team prioritize which large items need to come out first to clear pathways in the new house.
Before the cargo container arrives at your new property, prepare the physical space. Clear all entryways, hallways, and doorways of obstacles. If there are tight corners or low-hanging fixtures, plan a clear path from the container parking spot to the house. Protecting your new home’s floors with cardboard sheets or plastic runners will also prevent scuffs and dirt during the high-traffic unloading process.
Frequently Asked Questions (FAQ)
Can I pack appliances with food or liquids inside?
No, you must never pack appliances with food, liquids, or moisture inside them. Before loading refrigerators, freezers, or washing machines into a cargo container, empty them completely, defrost them at least 24 to 48 hours in advance, and wipe down all internal surfaces until they are completely dry. Any trapped moisture will quickly turn into mold and mildew in the hot, humid environment of a sealed steel container, ruining the appliance and creating unpleasant odors. Secure all internal shelves and tape the doors shut with non-damaging painter’s tape or heavy-duty straps to prevent them from swinging open during transit.
How do I protect wooden furniture from moisture in a steel container?
Steel cargo containers can act like ovens in tropical climates, trapping humidity and causing condensation when temperatures drop at night. To protect solid wood furniture, avoid wrapping it directly in non-breathable plastic stretch wrap, which traps moisture against the wood grain and causes warping or mold. Instead, wrap the furniture in breathable cotton moving blankets or heavy paper pads first, then secure the outer layers with plastic wrap if necessary. Place large silica gel desiccant packs inside the container to absorb airborne moisture, and inspect the container’s rubber door seals for any signs of damage or leaks before loading.

Community discussion
Share your experience or ask a question. Comments are reviewed before publication.