
Finding the perfect storage solution for footwear in a compact home requires balancing spatial efficiency with daily accessibility. When floor space is limited, a narrow shoe rack organizer serves as an essential tool to declutter entryways, bedroom closets, and tight hallways. Selecting the right model, however, is not just about finding an appealing design; it requires precise physical measurements, an understanding of structural stability, and a clear assessment of your household’s specific footwear dimensions.
To choose a rack that integrates seamlessly into your home, you must measure the three primary dimensions of your available space, account for swing clearances of nearby doors, and select a style that matches your wall or floor layout. In highly humid tropical environments, such as in the Philippines, you must also consider material finishes and ventilation to protect your footwear from moisture damage. Taking these systematic steps ensures your new organizer functions perfectly without obstructing daily foot traffic.
How to Measure Your Tight Space for a Shoe Rack
Before browsing online marketplaces or visiting local furniture showrooms, you must establish the exact physical boundaries of the installation area. Relying on visual estimates often results in purchasing units that block pathways or prevent doors from opening fully.
Products mentioned in this guide
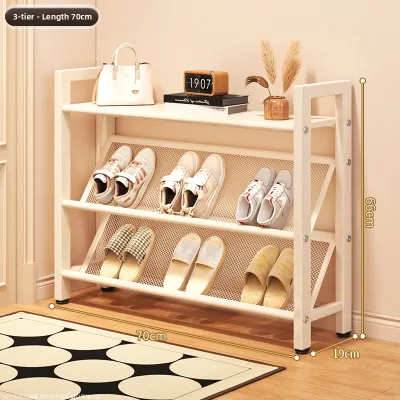
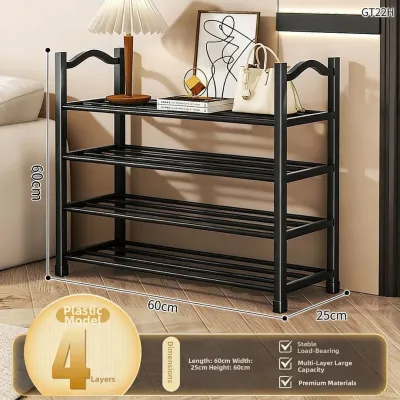
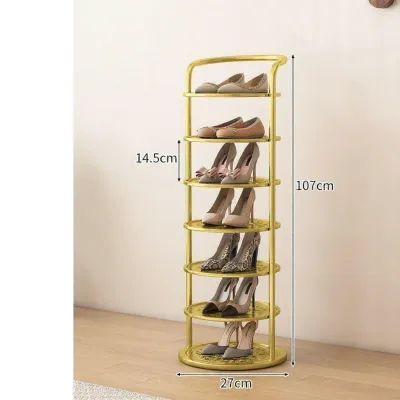
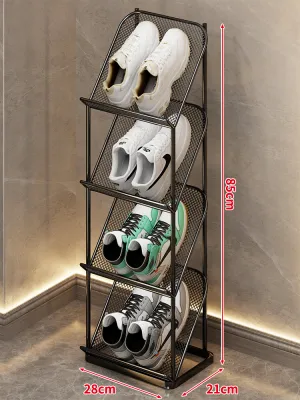
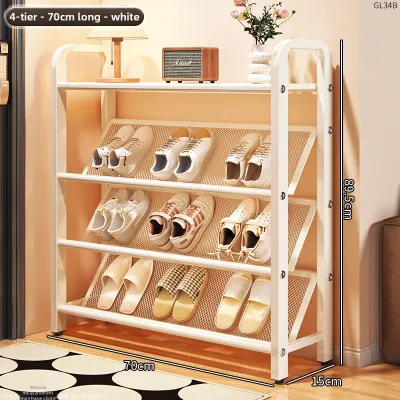
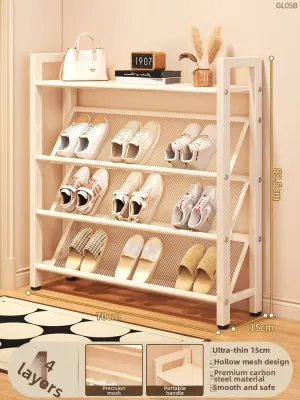
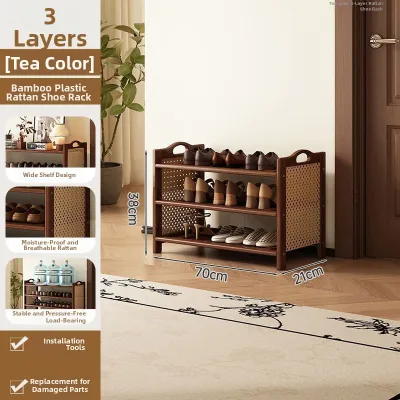
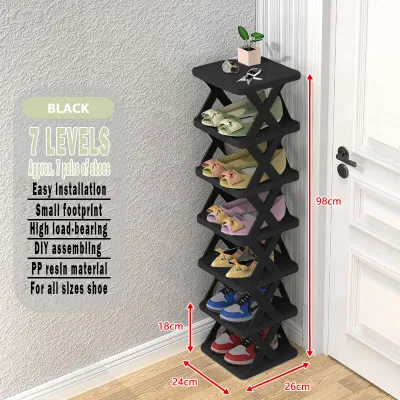
Prices are valid at publication and may change. Please refer to the product page for the latest price.
To begin, obtain a heavy-duty metal tape measure. Soft sewing tapes can sag over longer distances, leading to inaccurate readings. Measure the three critical axes of the designated space:
- Width: Measure the horizontal distance from wall to wall, or from the edge of a closet opening to the nearest obstruction.
- Depth: Measure from the back wall outward to the maximum point where the rack can sit without protruding into walking paths.
- Height: Measure from the floor to the ceiling, or to the underside of hanging clothes rods if placing the rack inside an existing closet system.
Next, identify and account for architectural obstacles that reduce usable floor space. Baseboards, wall trim, and door casings often project outward by 1 to 3 centimeters, preventing a flat-backed shoe rack from sitting flush against the wall. Measure the thickness of these baseboards and subtract this value from your total available depth. Additionally, check for low-hanging light switches, electrical outlets, or wall-mounted fixtures that a tall vertical rack might obstruct.
Finally, evaluate the door swing clearance. Open every adjacent door—including hinged closet doors, sliding panels, bi-fold systems, and nearby room entryways—to its maximum angle. Measure the sweep path of the door. A narrow shoe rack organizer must sit entirely outside this radius to prevent physical collisions, scraped finishes, or restricted access to your clothing.
Choosing the Right Narrow Shoe Rack Type for Your Layout
Different tight-space scenarios require distinct structural designs. Matching the rack style to your room’s physical layout maximizes storage capacity while preserving floor space.

Tiered Freestanding Racks
Tiered freestanding units are highly versatile and ideal for narrow floor strips along hallways or inside deep closets. These racks typically feature a shallow depth ranging from 15 to 25 centimeters. When selecting a freestanding model, check the manufacturer’s specified base dimensions rather than just the shelf size, as stabilizing legs often flare outward. Ensure your doorway or lift access can accommodate the unit if it arrives pre-assembled, though many narrow models require home assembly.
Over-the-Door and Hanging Organizers
When floor space is completely unavailable, hanging organizers utilize vertical door surfaces. These systems use metal hooks that drape over the top edge of standard doors. Before purchasing, verify your door’s thickness against the hanger hook dimensions; standard interior doors are usually 3.5 to 4 centimeters thick. You must also check the clearance gap between the top of the door and the frame to ensure the door can still close smoothly. Consider the weight limits of both the organizer and the door hinges, as a full set of heavy shoes can strain lightweight hinge screws over time.
Wall-Mounted or Floating Shelves
Wall-mounted shelves elevate shoe storage off the floor, making them excellent for utilizing dead vertical space above baseboards. Because these units rely entirely on wall support, you must verify your wall construction. In many homes, walls are made of solid concrete or concrete hollow blocks, which require masonry drill bits, heavy-duty wall anchors (tox), and screws for secure installation. If mounting to gypsum board or drywall, you must locate the wooden or metal studs behind the wall; do not rely on simple drywall anchors to support the weight of multiple pairs of shoes.
Sliding or Pull-Out Closet Systems
For deep but exceptionally narrow closet gaps, sliding or pull-out organizer tracks can be installed. These systems allow you to pull the entire shoe rack outward like a drawer, exposing the footwear. These systems require highly precise internal depth and width measurements. You must ensure the sliding tracks have adequate side clearance to bypass closet door hinges or sliding door tracks when extended.
Key Dimensions and Clearance to Check Before Buying
To ensure your footwear actually fits onto the organizer and remains easy to retrieve, you must compare your shoes’ physical dimensions with the rack’s shelf specifications.
- Shelf Height Clearance: Standard flat shoes, sandals, and low-profile sneakers generally require a vertical clearance of 12 to 15 centimeters. High heels, mid-top sneakers, and ankle boots need 18 to 25 centimeters, while tall boots require 30 to 45 centimeters of vertical space. Look for racks with adjustable shelf heights or removable panels so you can customize the vertical spacing as your footwear collection changes.
- Depth Requirements: An adult shoe typically requires a shelf depth of 25 to 30 centimeters to sit completely flat. If you select an ultra-narrow rack with a depth of only 15 to 20 centimeters, standard shoes will overhang the front edge. To solve this in tight hallways, look for "tipping" or angled shoe cabinets, which store shoes vertically or at an angle behind a closed door panel, reducing the cabinet's outer profile.
- Door and Drawer Clearance: When placing a shoe organizer inside a wardrobe, ensure the outer frame does not impede the movement of bi-fold door tracks or internal dresser drawers. If the rack sits too close to a sliding door track, the door may rub against the front of the shoes, causing scuffs and wear over time.
Common Sizing Mistakes to Avoid in Small Spaces
Avoiding common measurement pitfalls during the planning stage prevents the frustration of return shipping and unusable furniture.
One frequent error is measuring the closet space only when the doors are closed. Bi-fold and sliding closet doors often occupy a portion of the closet’s interior depth when opened. Always measure the net usable opening width and depth while the doors are fully open and folded back.
Another common mistake is ignoring the rack’s base footprint. Some narrow metal or wooden organizers feature stabilizing feet, anti-tip brackets, or base plinths that extend 2 to 5 centimeters beyond the actual shelving frame. Always check the manufacturer’s “maximum footprint” dimensions rather than relying solely on “shelf dimensions” to ensure the base fits within your measured floor area.
Additionally, many homeowners overlook the necessity of ventilation in tight, enclosed storage spaces. In tropical regions characterized by high humidity and distinct rainy seasons, storing damp or worn shoes in an airtight, narrow cabinet promotes mold growth, mildew, and unpleasant odors. Opt for open-slat shelf designs, wire mesh grids, or well-ventilated cabinet backings. Ensure there is a clearance gap of at least 2 to 3 centimeters between the back of the rack and the wall to facilitate natural airflow.
Stability and Safety for Narrow Footprints
Because narrow shoe racks have a shallow base and a tall vertical profile, they possess a naturally high center of gravity. This structural characteristic increases the risk of tipping, especially when the unit is fully loaded or installed on uneven flooring.
To mitigate tipping risks, tall freestanding units should be anchored securely to the wall. Many manufacturers include anti-tip hardware, such as furniture straps or L-brackets, in the packaging. If your home has concrete walls, use a masonry drill to install plastic wall plugs before driving in the mounting screws. For homes with drywall, ensure the anchor screws penetrate directly into a wall stud, or use heavy-duty toggle bolts if studs are inaccessible.
Your loading habits also directly affect the stability of a narrow organizer. Always place your heaviest footwear, such as leather work boots, thick-soled sneakers, or heavy safety shoes, on the bottom shelves. Reserve the upper tiers for lightweight items like sandals, slippers, and canvas flats. This distribution of weight lowers the overall center of gravity, significantly improving the physical stability of the rack during daily use.
When choosing materials, do not assume that a specific material name guarantees long-term durability. Instead, inspect the quality of the protective finish, the strength of the joint connectors, and the manufacturer’s care instructions. In high-humidity environments, look for metal components treated with rust-resistant powder coatings, or engineered wood sealed with moisture-resistant laminates, ensuring your narrow shoe rack organizer remains safe, stable, and functional for years to come.
Frequently Asked Questions (FAQ)
Will a narrow shoe rack fit large sneakers or boots?
Standard narrow shoe racks with flat shelves under 25 centimeters in depth will typically cause larger sneakers or boots to overhang the front edge. If your household wears larger shoe sizes or tall boots, look for narrow organizers that feature angled shelves, which utilize vertical height to accommodate longer soles. Alternatively, select modular racks with removable or adjustable shelves, allowing you to create taller compartments for boots while keeping shallow shelves for smaller footwear.

Community discussion
Share your experience or ask a question. Comments are reviewed before publication.