
To choose the right L-shaped space saver rack, you must measure the two wall lengths extending from the corner vertex to your desired outer limits, determine the maximum allowable depth that won’t block foot traffic, and verify the height against any overhead obstructions. A successful installation relies on subtracting the thickness of your baseboards and leaving a small clearance buffer for assembly. By taking these precise physical measurements before browsing online marketplaces, you can select a unit that maximizes vertical storage without overcrowding your room.
An L-shaped rack is an excellent way to reclaim underutilized corner space, especially in compact living environments where floor area is limited. However, because these units extend along two intersecting planes, a single incorrect measurement can prevent the entire frame from sitting flush or block essential pathways. Taking the time to map out your corner ensures that your furniture functions as a practical storage solution rather than a spatial obstacle.
Why Accurate Corner Measurement Matters for L-Shaped Racks
Corner spaces are often deceptive, appearing much larger than they actually are until you attempt to place a rigid, double-sided piece of furniture within them. In multi-purpose rooms or compact apartments, introducing a substantial L-shaped rack can dramatically alter the visual weight and physical flow of the environment. If the rack is too large, it can make a room feel cramped, dark, and cluttered, defeating the purpose of an organized study or home office.
Products mentioned in this guide
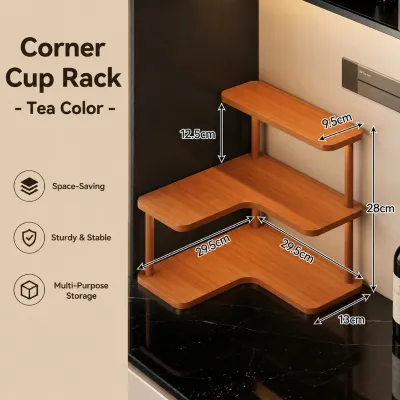
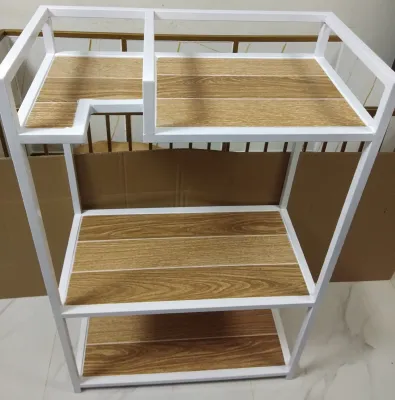
Prices are valid at publication and may change. Please refer to the product page for the latest price.
Daily movement and traffic flow must dictate the maximum footprint of your furniture. An overextended shelf that juts into a high-traffic path creates a constant tripping hazard and restricts comfortable movement. Planning your layout with precise dimensions ensures that you preserve a natural pathway, allowing family members to walk past without having to squeeze or turn sideways.
Furthermore, many home corners are not perfectly square. Settling, plastering imperfections, or irregular wall construction can create corners that are slightly acute or obtuse. Understanding the true shape of your architectural corner prevents alignment issues that could leave unsightly gaps or prevent the rack from fitting into the corner at all.
Step-by-Step Guide to Measuring Your Corner Space
To begin, clear the corner of all existing items so you have direct access to the walls and floor. Place your tape measure directly into the innermost corner vertex where the two walls meet. Extend the tape horizontally along the first wall to the point where you want the rack to end, and record this measurement as Wall Length A. Repeat this exact process along the second wall to determine Wall Length B, keeping the tape perfectly flat and parallel to the floor.

Next, inspect the walls for any physical obstructions that could interfere with the rack’s back panels or upright supports. Look closely for baseboards, quarter-round moldings, electrical outlets, light switches, internet ports, or wall-mounted fixtures like fans and air conditioning units. If an outlet falls directly behind where the rack will sit, you must decide whether you need continuous access to it, which may require you to adjust your maximum rack length or choose a unit with an open-back frame.
Finally, you must verify whether your corner forms a true 90-degree angle. You can check this easily using a carpenter’s square pressed firmly into the corner. Alternatively, use the simple 3-4-5 triangle method: measure exactly 3 feet along one wall from the corner and make a light pencil mark, then measure 4 feet along the adjacent wall and make another mark. Measure the diagonal distance between these two marks; if the corner is a perfect right angle, the diagonal distance will measure exactly 5 feet. Any significant deviation indicates that you will need to account for a gap when installing your rack.
Translating Room Measurements into Rack Dimensions
Once you have your raw wall measurements, you must translate them into the actual product dimensions listed on product detail pages. Manufacturers typically provide the overall width, depth, and height of the unit. For an L-shaped rack, the “width” and “length” usually refer to the outer dimensions of the two perpendicular sides. It is crucial to distinguish these outer dimensions from the internal shelf lengths, as the overlapping corner section of the rack reduces the actual usable shelf space.
The physical depth of the shelves is another critical factor that determines how far the unit will protrude into your living space. If you select a rack with deep shelves, it will extend further out from both walls, narrowing the remaining floor space in your room. Ensure that the combined depth of the shelves does not overlap with nearby doorways or window frames.
You must also factor in necessary clearance margins for assembly and maintenance. Many flat-pack L-shaped racks require you to assemble them flat on the floor before raising them upright, which demands extra ceiling height and floor clearance. Additionally, leaving a small gap of 1 to 2 centimeters between the rack and the walls is highly recommended, especially in humid tropical climates. This gap promotes healthy air circulation, preventing moisture buildup and mold growth behind the furniture, while also allowing easy access for regular cleaning and dusting.
Checking Clearance, Pathways, and Structural Limits
Before finalizing your purchase, map out the surrounding area to ensure the rack does not obstruct daily room functions. Measure the swing radius of nearby doors, wardrobe panels, and windows to confirm they can open fully without striking the rack.
The structural integrity of your walls and floor is equally important when planning a large shelving unit. L-shaped racks can hold a significant amount of weight, making stability a primary safety concern. If you plan to store heavy books or equipment, check whether the rack comes with wall-anchored anti-tip kits. Installing these anchors is highly recommended, particularly on concrete or masonry walls common in local homes, to prevent accidental tipping. Ensure you have the correct drill bits and wall plugs suitable for your specific wall material.
Always review the manufacturer’s weight capacity guidelines for each shelf level rather than guessing its strength. Overloading a shelf can cause sagging, joint failure, or complete structural collapse over time. If you intend to store heavy items like printers, reference manuals, or heavy decorative pieces, verify that the product specifications explicitly support those loads. Distribute the weight evenly across the shelves, placing the heaviest items on the bottom levels to maintain a low center of gravity and maximize stability.
Common Sizing Mistakes to Avoid
One of the most frequent mistakes when buying an L-shaped rack is failing to account for the thickness of baseboards and wall moldings. If you measure only the wall-to-wall distance at chest height, your rack may end up sticking out further than expected at the base, potentially blocking doors or overlapping adjacent furniture.
Another common error is misinterpreting the dimensional diagrams provided in online product listings. Some diagrams display diagonal measurements or complex corner-to-edge dimensions that can easily be confused with the actual wall-hugging length. Always double-check the written specification list for the individual lengths of the left and right sides of the “L” to ensure you are comparing the correct values to your physical wall measurements.
Finally, do not forget to measure the delivery pathway leading to your designated room. An L-shaped rack, even when flat-packed, can come in exceptionally long or heavy boxes that must navigate narrow corridors, tight stairwells, low ceilings, or small condominium elevators. Measure the width and height of every doorway and turn along the entry path to guarantee that the packaged product can safely reach its final assembly destination without getting stuck.
Frequently Asked Questions (FAQ)
Can I use an L-shaped rack if my corner is not exactly 90 degrees?
Yes, you can still install an L-shaped rack in an imperfect corner, but you must make a few adjustments. If the corner angle is slightly wider than 90 degrees, the rack will sit flush at the vertex but leave a small, widening gap along the walls as it extends outward. If the corner is narrower than 90 degrees, the outer edges of the rack will touch the walls first, leaving a gap at the inner vertex. To manage this, choose a rack with adjustable leveling feet to compensate for uneven floors, and pull the unit slightly away from the corner to align it visually with the walls.
How do I measure for an L-shaped rack with a desk attachment?
When measuring for a combo unit that includes a built-in desk, you must account for both storage space and user comfort. Measure the height of the desk surface to ensure it aligns comfortably with your seating preferences and does not block low window sills. Additionally, measure the clearance space underneath the desk for your legs and office chair. You should allow at least 60 to 75 centimeters of depth in front of the desk portion for chair rotation and comfortable movement, ensuring that your workspace does not feel cramped during long hours of use.

Community discussion
Share your experience or ask a question. Comments are reviewed before publication.