
Packing for a lipat bahay (moving day) in the Philippines often involves dealing with a chaotic tangle of television, internet, and appliance cords. Using a dedicated cord organizer box is the most effective way to keep these cables sorted, protected from tropical humidity, and ready for quick setup in your new home. By systematically sorting, coiling, labeling, and arranging your cables, you can transition your home office or entertainment center seamlessly without the frustration of untangling a giant knot of wires. Taking the time to organize your cables before the move saves hours of troubleshooting later when you are trying to get your internet connection or home office back online.
Gather the Right Supplies for Cable Packing
To start your cable organization project, you need the right tools. A sturdy cord organizer box with adjustable dividers or compartments is the foundation of this process. These boxes allow you to customize the interior layout based on the length and thickness of your cables, keeping individual cords isolated and protected.
When securing your coiled cables, choose reusable hook-and-loop straps or plastic twist ties. Avoid using standard rubber bands. In the warm, humid climate of the Philippines, rubber bands degrade rapidly, melting onto the cable jackets or snapping under tension during transit, leaving a sticky residue that is incredibly difficult to clean.
Products mentioned in this guide
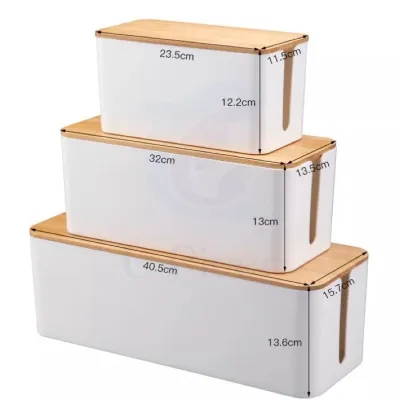
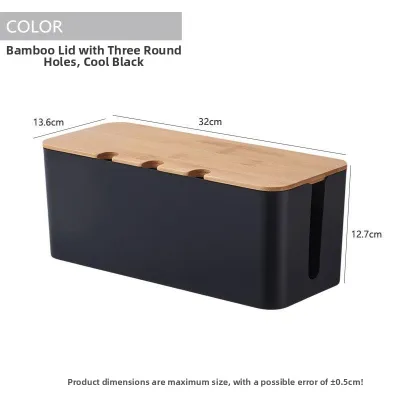
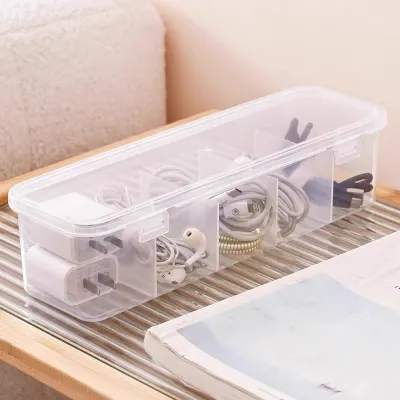
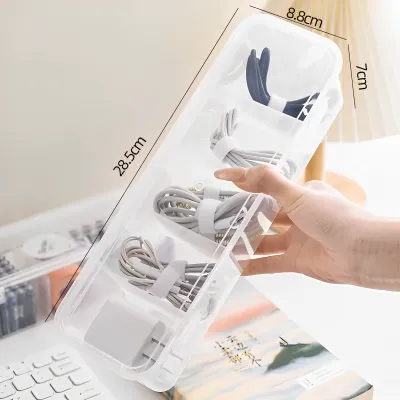
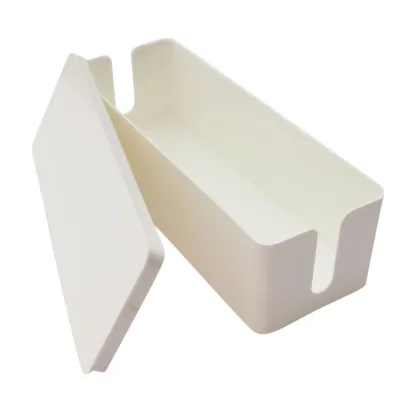

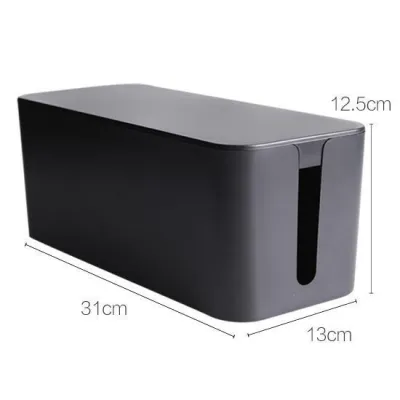
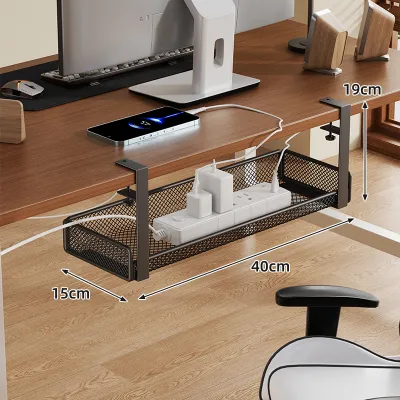
Prices are valid at publication and may change. Please refer to the product page for the latest price.
For labeling, prepare a handheld label maker, high-quality masking tape, or color-coded adhesive stickers. Ensure the adhesive is strong enough to withstand warm moving trucks but won’t leave a sticky, hard-to-clean residue on your cords.
Finally, gather protective wrapping materials. Small sheets of bubble wrap or soft microfiber cloths are excellent for wrapping fragile power adapters, heavy charging bricks, and delicate gold-plated connectors. Having these supplies ready before you begin prevents interruptions and keeps your packing workflow efficient.
Sort and Declutter Your Cables Before Packing
Before placing a single wire into your cord organizer box, take the time to audit your collection. Moving is the perfect opportunity to declutter, ensuring you do not waste valuable packing space on dead or obsolete technology.

Begin by testing your cables for functionality. Plug them in to verify they still charge or transfer data reliably. Inspect the entire length of each cord for frayed outer jackets, exposed copper wires, or bent pins. Discard any damaged cables immediately, as they pose a safety hazard.
Separate obsolete cords that belong to devices you no longer own. Old analog video cables, proprietary chargers for ancient mobile phones, and duplicate power cords can be set aside.
Group the remaining functional cables by room, device type, or priority. For example, keep your living room entertainment system cables separate from your home office computer cords. This logical grouping makes unpacking much more manageable.
For the cables you decide to discard, check local manufacturer guidelines or community recycling programs for proper electronic waste (e-waste) disposal. Many cities in the Philippines have designated drop-off points for electronics recycling to prevent hazardous materials from reaching landfills.
How to Coil and Secure Cables Without Damaging Them
Proper coiling is the most critical step in preserving the lifespan of your cables. Wrapping cords tightly around your hand or elbow creates severe tension, twisting the internal copper conductors and eventually causing connection failures.
Instead, use the professional “over-under” coiling method. This technique involves alternating the direction of the loops as you coil the cable, which neutralizes the natural twist of the wire. When you unpack, an over-under coiled cable will pull straight out without a single kink or knot.
Always leave adequate slack at both ends of the cable, especially near the plug and the device connector. Bending a cord sharply right where it meets the plastic housing puts immense stress on the solder joints, leading to loose connections.
Once coiled, secure the loop loosely with a hook-and-loop strap or a twist tie. For standard charging cables, a single strap in the middle is sufficient. For longer cords, secure the coil at two or three points to keep the loops perfectly aligned during the bumpy ride in the moving truck.
Avoid tight bends, sharp kinks, or pulling the straps too tightly. The outer protective casing of cables can become brittle over time, particularly when exposed to fluctuating temperatures during a move, so gentle handling is essential.
Create a Clear Labeling System for Easy Unpacking
A cord organizer box is only as good as its labeling system. Without clear identification, you will find yourself staring at a box of identical black power cords, guessing which one belongs to your router and which one powers your monitor.
Apply labels to both ends of each cord. This double-labeling technique ensures you can identify the cable even if it is partially plugged in or buried behind a heavy media console in your new home.
Establish a standardized naming convention that includes both the room and the specific device. For example, write “Living Room – TV Power” or “Study – Router Adapter” instead of a generic label like “Power Cord.”
Incorporate color-coded stickers or colored tape to make visual sorting even faster. You can assign blue stickers to home office equipment, green to living room entertainment, and yellow to kitchen appliances. A quick glance at the cord organizer box will tell you exactly where each cable belongs.
Always apply the labels directly to the cable jacket or wrap them like a flag around the wire. Avoid placing labels on the metal connectors or plugs, as the adhesive can interfere with the electrical connection or prevent the plug from seating fully into the socket.
Arrange and Protect Cords Inside the Organizer Box
Once your cables are coiled, secured, and labeled, it is time to pack them systematically into your cord organizer box. Proper arrangement prevents damage from shifting and ensures delicate components are not crushed.
Place heavier items, such as large power bricks, laptop adapters, and extension blocks, at the bottom of the box. This creates a stable base and prevents heavy components from crushing lighter, more delicate cables underneath.
Utilize the adjustable dividers inside your cord organizer box to create dedicated compartments. Keep different categories of cables separated—such as keeping USB-C charging cables in one section and HDMI cables in another—to prevent them from rubbing against each other.
Wrap fragile or exposed connectors, such as fiber optic tips or gold-plated HDMI plugs, in small pieces of bubble wrap or soft cloth. This extra layer of protection prevents scratches and keeps dust or debris from entering the sensitive connection points.
Be careful not to overpack the organizer box. There should be enough clearance at the top to close the lid easily without pinching or compressing any cords. Forcing the lid shut can bend connectors and damage the internal wiring of the top layer of cables.
Unpack and Reconnect Your Electronics Efficiently
When you arrive at your new home, the cord organizer box should be one of the first items you unpack in your designated electronics or entertainment area. Having all your power and data connections centralized saves you from rummaging through multiple moving boxes.
Use your established labels to route cables efficiently. Position your devices first, then match the labeled cords to their respective ports and power outlets. This systematic approach prevents the common mistake of routing cables through tight spaces only to realize they belong to a different device.
Before plugging any cable into the mains, perform a quick visual inspection. Check for any signs of transit damage, such as pinched jackets or bent pins that may have occurred if the box shifted during the move.
Once your electronics are fully set up, do not discard or store the empty cord organizer box in a hard-to-reach attic. Keep it in an accessible closet or under your desk. It serves as an excellent permanent storage solution for spare cables, keeping your new home organized and clutter-free.
Frequently Asked Questions (FAQ)
Can I pack power strips with the cords still plugged in?
It is highly recommended to unplug all devices from your power strips before packing. Leaving plugs inserted during a move puts constant lateral pressure on both the plug prongs and the internal sockets of the power strip. This pressure can easily bend the prongs or loosen the internal contacts, creating a fire hazard when reused. Instead, unplug every cord, coil the power strip’s main cable separately, and secure it to the body of the strip using a hook-and-loop strap.
What is the best way to pack extremely long cables like ethernet or HDMI?
Extremely long cables, such as 10-meter ethernet lines or long HDMI cords, require extra care because they contain delicate internal shielding that can degrade if bent too sharply. Fold these long cables into large, gentle loops rather than tight, compact coils. Secure the loops with straps at three or four different points to maintain their shape. Place these large coils in a dedicated, wide compartment of your cord organizer box, or lay them flat at the very bottom of the box beneath the dividers.

Community discussion
Share your experience or ask a question. Comments are reviewed before publication.