
Replacing the wheels on your gaming chair is a straightforward DIY task that can instantly restore smooth movement, protect your flooring, and eliminate annoying squeaks. Most gaming chairs use standard grip-ring stem casters that can be popped out and replaced in under twenty minutes without professional assistance. Whether your current wheels are clogged with dust, cracked from years of use, or scratching your tiles, upgrading them is a cost-effective way to extend the lifespan of your favorite seat. By understanding the correct measurements, gathering a few basic household tools, and following a systematic removal and installation process, you can safely upgrade your chair’s mobility while avoiding damage to its base.
Identify Your Caster Stem Size and Base Type
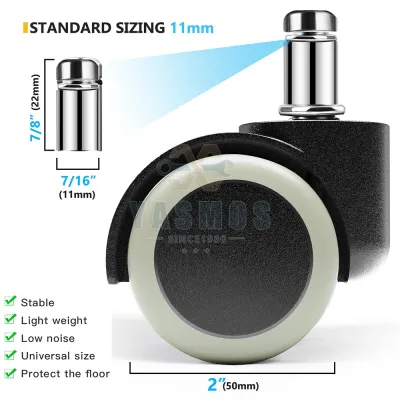
To ensure your new wheels fit perfectly, you must first determine the exact dimensions of your existing caster stems. The vast majority of office and gaming chairs utilize a grip-ring stem, which is a metal cylinder with a small, flexible metal ring near the top. This ring compresses when pushed into the socket and expands to lock the wheel in place. The standard size for these stems is 11mm in diameter and 22mm in length. However, some brands use a smaller 10mm diameter stem. Using a digital caliper or a precise ruler is the most reliable way to measure the stem of a wheel you have pulled out. Measure the width of the metal pin, not the plastic housing, to verify compatibility before ordering replacements from an online marketplace.
The material of your gaming chair’s five-star base also plays a critical role in selecting the right replacement casters. Chair bases are typically constructed from heavy-duty nylon plastic, steel, or aluminum alloy. Plastic bases are common in budget-friendly models but can be prone to hairline cracks around the socket walls if subjected to excessive lateral force during wheel removal or heavy weight loads. Metal bases offer higher structural rigidity and can handle heavier caster stems, but their sockets can sometimes develop rust in humid tropical environments. Inspecting the condition of your base’s sockets for any signs of stress, stretching, or corrosion ensures that the new stems will seat securely and remain perfectly vertical.
Products mentioned in this guide
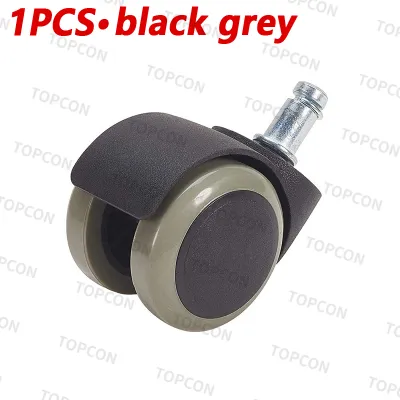
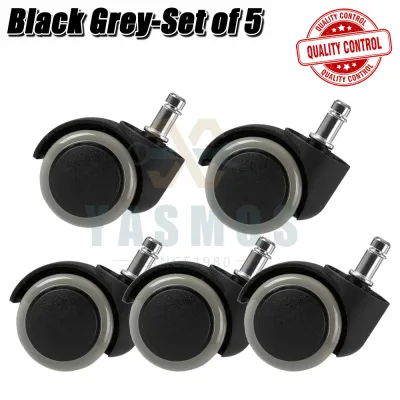

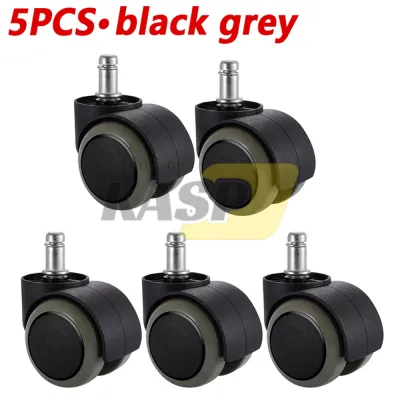
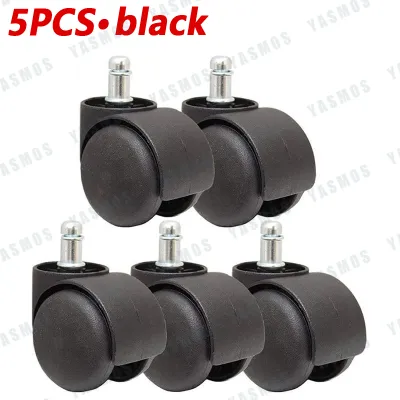

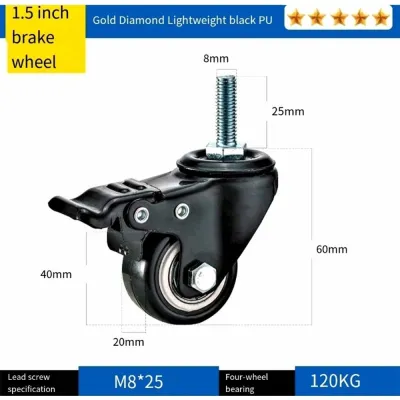
Prices are valid at publication and may change. Please refer to the product page for the latest price.
Finally, consider the primary floor surface in your gaming setup or home office to choose the correct wheel tread material. Standard twin-wheel casters are usually made of hard nylon, which glides easily on low-pile carpets but can easily scratch hardwood, laminate, or vinyl tiles. If you are rolling directly on hard floors, look for polyurethane (PU) or rubber-coated wheels, which provide a softer grip and prevent surface abrasion. For those who prefer maximum glide and a modern look, rollerblade-style polyurethane wheels are a popular aftermarket option. Matching the wheel material to your flooring not only protects your home but also reduces rolling noise during late-night gaming sessions.
Gather Tools and Prepare Your Workspace
Before starting the replacement process, gathering the right tools and setting up a clean, spacious workspace will prevent accidental damage to your chair, your floors, and your hands. While many caster wheels can be pulled out by hand, older or stubborn wheels often require a bit of mechanical assistance. Keep a flathead screwdriver, a sturdy butter knife, or a small pry bar nearby to help leverage the stem out of the socket. A rubber mallet or a hammer wrapped in a thick towel is also useful for gently tapping stubborn wheels out or seating new ones without cracking the plastic housings.

Protecting your workspace is essential, especially if you are working on sensitive flooring like polished wood or ceramic tiles. Lay down a thick piece of cardboard, an old yoga mat, or a folded blanket on the floor where you plan to work. This protective barrier prevents the metal gas lift cylinder or the plastic star base from scratching the floor when you flip the chair over. It also catches any loose dirt, grease, or metal shavings that might fall out of the old wheel sockets during the extraction process.
Lastly, prepare some basic cleaning supplies to prep the sockets before installing the new casters. A dry microfiber cloth, a small brush or old toothbrush, and a can of compressed air or a cotton swab are highly effective for clearing out accumulated dust, hair, and degraded grease. In humid climates, moisture can mix with dust inside the sockets, creating a sticky residue that hinders smooth wheel rotation. Cleaning these areas beforehand ensures the new caster stems slide in smoothly and lock securely without grinding against trapped debris.
Step-by-Step: Removing the Old Casters
To begin the removal, you must position the gaming chair safely to access the underside of the base. Roll the chair onto your prepared protective mat, lower the gas lift to its lowest setting to prevent sudden movement, and carefully tilt the chair backward until it rests upside down. For larger, heavier gaming chairs, it is often safer to rest the headrest and armrests on the floor while supporting the base. Ensure the chair is stable and will not tip over or slide while you are applying force to the wheels. If the chair feels top-heavy, you can gently unscrew the entire five-star base from the gas lift, though this is usually unnecessary for a simple wheel swap.
Once the chair is stable, attempt to remove the first caster using manual force. Grip the wheel firmly with both hands, placing your thumbs against the star base for leverage, and pull straight upward away from the socket. Avoid pulling at an angle, as this can bend the metal stem or put uneven pressure on the plastic socket walls, potentially causing them to crack. In many cases, a firm, steady pull is all that is required to compress the grip ring and release the stem from its housing. Repeat this process for all five wheels, placing the old casters aside in a container so any loose grease does not stain your floor.
If a caster is stuck and refuses to budge with manual pulling, you will need to use a leverage tool. Slide the flat head of a screwdriver or the flat edge of a pry bar between the top of the caster housing and the underside of the chair base. Gently wiggle the tool to find a secure leverage point against the metal stem, then pry downward to pop the stem out of the socket. To protect plastic bases from denting, place a small block of wood or a folded rag under the tool’s pivot point. If the wheel is severely seized due to rust or structural damage, stop immediately. Forcing it can permanently fracture the base; instead, apply a small drop of penetrating lubricant around the stem, let it sit for a few minutes, or consult the manufacturer’s support guidelines.
Step-by-Step: Installing the New Wheels
With the old casters removed, the next step is to prepare the empty sockets for the new installations. Inspect each socket hole on the star base using a flashlight to check for any leftover metal retaining rings from the old stems, which sometimes break off and remain trapped inside. Use a pair of needle-nose pliers to extract any broken rings or debris. Wipe the inside of each socket with a dry cotton swab or cloth to remove old, dirty grease and accumulated dust. A clean socket ensures that the new grip ring can expand fully and lock the stem securely in place without any wobbling.
To install a new wheel, align the metal stem of the caster directly with the opening of the socket. Hold the caster straight, ensuring the stem is not tilted, as inserting it at an angle can damage the socket lining or bend the grip ring. Once aligned, push the caster firmly into the socket using the palm of your hand. You should feel a distinct click or snap as the grip ring compresses and then expands inside the internal groove of the socket. If the stem is tight and requires extra force, place a folded towel over the wheel and tap it gently with a rubber mallet until it is fully seated against the base.
After inserting all five wheels, conduct a visual and physical check of each caster’s seating depth. Every wheel housing must sit flush against the underside of the star base with no visible gaps or uneven spacing. If one wheel sits higher than the others, it indicates the stem is not fully inserted, which will cause the chair to wobble and put uneven stress on the base. Gently wiggle each caster to ensure there is no excessive play or loose movement within the socket. Once all wheels are verified as flush and secure, the physical installation phase is complete.
Test the Chair and Maintain the Casters
With the new wheels securely installed, carefully flip the gaming chair back to its upright position, ensuring you do not drop its full weight onto the new casters immediately. Sit in the chair slowly to apply even, vertical weight across all five points of the base. Roll slowly forward, backward, and in a complete circle on your floor. Listen closely for any unusual clicking, squeaking, or grinding noises, which could indicate an improperly seated stem or a manufacturing defect in the wheel bearings. The movement should feel smooth, effortless, and stable in every direction.
To maximize the lifespan of your new casters, establish a simple routine maintenance schedule every few months. Gaming chairs operate close to the floor, making them magnets for hair, dust, clothing fibers, and pet fur. Over time, these materials wrap tightly around the wheel axles, increasing friction, restricting rotation, and eventually causing flat spots on the treads. Periodically inspect the wheels and use a pair of tweezers, a small utility knife, or a seam ripper to carefully cut away any tangled fibers. Keeping the axles clear prevents the wheels from dragging and scratching your floors.
Additionally, keep an eye out for observable signs of wear that indicate your casters need cleaning or eventual replacement. If you notice the chair requires more effort to push, or if the wheels slide sideways instead of rotating, it is time to inspect them. Look for flat spots on the tread, cracks in the polyurethane coating, or rust forming on the metal stems. In highly humid environments, a tiny drop of silicone-based lubricant applied directly to the wheel bearings can restore silent, smooth gliding, but avoid using heavy oils that attract more dust and debris.
Troubleshooting Common Replacement Issues
Even with careful preparation, you may encounter a few common obstacles during the wheel replacement process. One frequent issue is a new caster stem that refuses to slide fully into the socket. This is usually caused by a mismatch in stem size, such as trying to force an 11mm stem into a 10mm socket. Double-check your measurements with a caliper to ensure compatibility. If the size is correct but the stem still will not go in, check for a misaligned grip ring on the new stem. You can use a pair of pliers to gently squeeze the ring closer to the stem body, making it easier to slip past the socket entrance.
Another common problem is an uneven or wobbly chair after installation. If the chair tilts or rocks when you sit on it, one or more casters are likely not fully seated in their sockets. Flip the chair back over and inspect the gap between each wheel housing and the base. If you find a gap, use a rubber mallet to tap the wheel firmly until it sits flush. If all wheels are flush but the chair remains uneven, inspect the star base itself for hairline cracks or bent legs, which can occur over time with plastic bases and require a complete base replacement.
In rare instances, an old, rusted caster stem may snap off, leaving the metal pin stuck inside the socket while the wheel body detaches. If this happens, do not attempt to drill it out, as this can easily destroy the socket walls. Instead, try using a pair of locking pliers to grab the exposed tip of the broken stem and pull it straight out. If the stem is broken flush with the socket opening, you can sometimes tap it out from the top of the base if the socket has a thru-hole, or use a screw extractor tool. If these methods fail or if you risk cracking the base, consulting a professional furniture repair service or replacing the entire five-star base is the safest course of action.
Frequently Asked Questions (FAQ)
Can I use rollerblade-style casters on my gaming chair?
Yes, you can use rollerblade-style casters on your gaming chair, provided you verify that the stem dimensions match your chair’s base sockets. Most aftermarket rollerblade wheels feature the standard 11mm by 22mm stem, making them highly compatible with a wide range of gaming chairs. These wheels utilize a single, tall polyurethane wheel with ball bearings, which offers a much faster, smoother, and quieter glide compared to traditional twin-wheel nylon casters. They are particularly excellent for hard floors like tile, hardwood, or laminate because the soft polyurethane tread prevents scratches without the need for a plastic chair mat.
However, there are a few trade-offs to consider before making the switch. Because rollerblade wheels are taller than standard casters, they will raise the overall height of your chair by about one to two inches. This change in height might affect your ergonomic setup, especially if your desk does not adjust or if your feet can no longer rest flat on the floor. Additionally, because they glide so easily, you might find your chair drifting slightly when you make sudden movements or lean back. Finally, always check your chair manufacturer’s warranty terms, as some brands may void coverage for structural damage if third-party casters are used.
Why is my gaming chair scratching the floor after replacing the wheels?
If your gaming chair is scratching the floor after you have installed new wheels, the most common cause is manufacturing debris or hard plastic fragments embedded in the wheel treads. Inspect the surface of each wheel closely for any sharp plastic burrs, leftover molding seams, or trapped grit from the shipping packaging. Wiping the treads down with a damp microfiber cloth can remove these abrasive particles. Another possibility is that one or more wheels are not fully seated in their sockets, causing the metal stem or the plastic base housing to drag directly against the floor when weight is applied.
It is also crucial to evaluate whether the tread material you selected is genuinely suitable for your specific flooring. Hard nylon or cheap plastic wheels will inevitably scratch delicate surfaces like hardwood, engineered wood, or soft vinyl over time. For these floors, you must use wheels with a soft polyurethane or rubber coating. If you are already using soft wheels and still experience scratching, check the floor itself for trapped dirt, sand, or small pebbles. The soft tread of polyurethane wheels can sometimes pick up loose grit from the floor and drag it across the surface, acting like sandpaper. Regular sweeping or vacuuming of your gaming area is essential to prevent this type of wear.

Community discussion
Share your experience or ask a question. Comments are reviewed before publication.