
Maximizing vertical space is a smart way to keep your home organized, especially when dealing with tight corners. A corner hanger rack offers an efficient storage solution, but its stability depends entirely on how securely it is anchored to your wall. In tropical climates like the Philippines, where high humidity can affect building materials over time, choosing the correct mounting method is essential to prevent sagging, damage, or sudden collapses.
Before you begin drilling, you must understand that different wall materials require completely different hardware and techniques. By taking the time to identify your wall type, gather the correct tools, and follow a systematic installation process, you can ensure your corner hanger rack remains safely in place.
Assess Your Wall Type and Gather the Right Tools
Identifying your wall material is the first and most critical step of the installation process. You can easily determine what lies behind your paint or plaster by performing a simple tap test. Tap your knuckles against the wall in several places; a dull, solid thud indicates solid concrete or a fully grouted hollow block, while a hollow, echoing sound suggests either drywall or standard hollow concrete blocks. Visually, drywall surfaces are perfectly smooth, whereas masonry walls often exhibit slight textures, visible mortar lines under thin plaster, or a cold-to-the-touch feel even in warm tropical weather.
Products mentioned in this guide
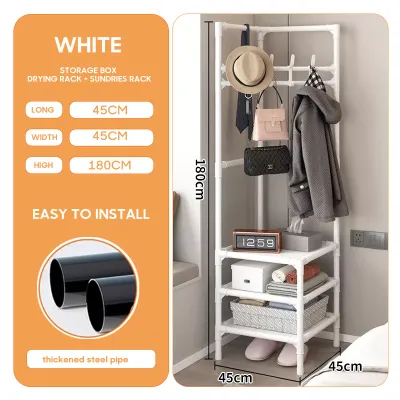
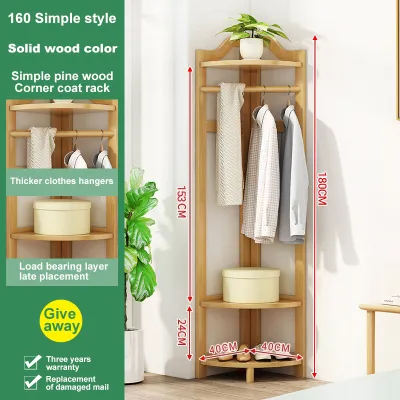
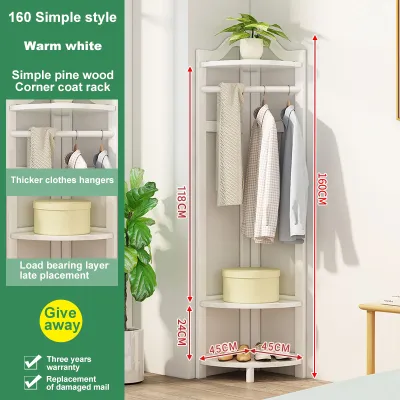

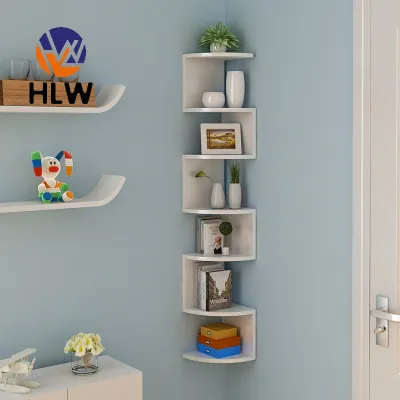
Prices are valid at publication and may change. Please refer to the product page for the latest price.
Once you have identified the wall material, you must measure your corner space carefully to ensure a proper fit. Use a metal tape measure to check the distance from the corner vertex along both walls, verifying that the finished dimensions of your corner hanger rack will clear any nearby window frames, light switches, or door swings. Take note of the rack’s height and ensure there is enough vertical clearance for hanging garments without crowding the ceiling or floor. If you live in a condominium or apartment, also verify that the packaged rack can easily pass through your doorways, hallways, and lift access before assembly.
Preparing the correct tools beforehand prevents mid-project delays and ensures a clean installation. Every wall type requires a set of universal tools: a reliable bubble level to keep the rack straight, a tape measure, a pencil for marking drill points, and a hand screwdriver. However, the drilling equipment and anchors must be tailored to your specific wall. For solid concrete, you will need a hammer drill and carbide-tipped masonry drill bits. For hollow blocks, specialized hollow-wall anchors or toggle bolts are necessary. For drywall, a stud finder is essential to locate structural framing, along with heavy-duty toggle bolts if no studs are available.
Step-by-Step Installation Guide for Each Wall Type
Transitioning from preparation to execution requires a strong focus on safety and precision. Before operating any power tools, put on protective eyewear and a well-fitting dust mask to shield yourself from airborne masonry dust or gypsum particles. Always check the manufacturer’s instructions for your specific corner hanger rack to match your drill bit diameter exactly to the recommended anchor size. Most importantly, establish immediate stop conditions: if your drill suddenly resists, hits a hard metal barrier, or brings up copper shavings, stop drilling immediately, as you may have encountered structural rebar, water pipes, or electrical conduits hidden within the wall.

Installing on Concrete Walls
Solid concrete walls offer the highest load capacity but require a hammer drill and carbide-tipped masonry bits. First, hold your corner hanger rack brackets against the corner, use a bubble level to align them, and mark the screw holes with a pencil. Drill completely perpendicular to the wall, going slightly deeper than the anchor length to accommodate residual dust.
Clearing out the concrete dust is vital for a secure hold. Use a vacuum, hand pump, or straw to blow the dust out of the hole; otherwise, the anchor may slip under load. Next, tap your sleeve anchors or plastic expansion plugs into the clean holes until they sit flush with the surface.
Align the rack brackets with the anchors and tighten the screws using a manual screwdriver. Tighten until the screw head is flush against the bracket and you feel firm resistance. Avoid over-tightening, which can strip the plug or crack the concrete, weakening the connection.
Installing on Hollow Block Walls
Hollow concrete blocks have hollow cavities and thin outer shells that require specialized hardware. Avoid standard plastic expansion plugs, which cannot grip the empty space. Instead, use specialized hollow block anchors, heavy-duty toggle bolts, or sleeve anchors designed for hollow masonry that expand or unfold inside the block’s internal void to clamp securely against the back of the outer shell.
Drilling into hollow blocks requires a gentle touch to prevent shattering the fragile block face. Switch your drill to standard rotary mode rather than the hammer setting, as the aggressive hammering action can easily crack or blow out the back of the block’s outer wall. Drill slowly through the plaster and the first layer of the block, stopping immediately once the bit penetrates into the hollow center.
If using toggle bolts, slide the spring-loaded wings onto the bolt, thread it through the rack’s bracket, and squeeze the wings closed before pushing them through the hole. You will hear a click as the wings spring open inside the cavity. Pull back slightly on the bracket to create tension, keeping the wings flat against the inside wall, and tighten the bolt until snug.
Installing on Drywall
Drywall, or gypsum board, lacks the inherent structural strength of masonry. Whenever possible, the most secure way to install a corner hanger rack on drywall is to mount it directly into the structural studs behind the board. Use an electronic stud finder to locate the vertical wood or metal framing members near the corner, mark the center of the studs, and use standard wood screws to secure the rack’s brackets directly into the framing.
If the layout does not align with the studs, you must use heavy-duty hollow-wall anchors, such as snap toggles or classic metal toggle bolts. Never rely on simple plastic threaded drywall anchors or push-in plugs, as the downward pulling force of clothes will easily tear them out of the soft gypsum core. Drill the appropriate size hole, insert the toggle mechanism through the drywall, pull it tight against the back of the board, and secure the collar flush with the front surface.
Because drywall is fragile, you must strictly observe weight limitations to prevent structural failure. It is highly recommended to downgrade the intended load of your corner hanger rack by at least half if it is mounted solely on drywall without stud support. Avoid hanging heavy garments or dense storage boxes; instead, reserve the rack for lighter clothing, hats, and decorative items.
Verify Stability and Load Capacity
After completing the installation, you must verify that the corner hanger rack is stable and safe for daily use. Begin with a visual inspection, looking closely at the wall surface around each anchor point for any signs of hairline cracking, plaster crumbling, or anchor slippage. Next, perform a physical shake test by gently grasping the rack near its mounting brackets and applying light, gradual pressure in different directions. The rack should feel completely rigid, with no wobbling, shifting, or visible deformation of the metal brackets.
To prevent overloading, check the manufacturer’s label or manual for the maximum load rating of your specific corner hanger rack model. Keep in mind that this rating assumes a perfect installation into solid material; if you mounted the rack on drywall or hollow blocks, your actual safe capacity will be lower. Always place your heaviest items on the lowest shelves or closest to the wall brackets to keep the center of gravity low and minimize the leverage pulling outward on the top anchors.
In humid tropical environments, moisture can slowly degrade certain wall materials or cause metal fasteners to rust over time. Periodically inspect your installation every few months, especially after heavy rainy seasons, to ensure no moisture has seeped into the drill holes. If you notice any rust staining, loose screws, or a slight tilt in the rack, remove the weight immediately and inspect the integrity of the anchors and the surrounding wall.
Troubleshooting Common Installation Issues
Even with careful planning, you may encounter issues during installation, such as a stripped or oversized hole. If a drill bit slips or the masonry crumbles, leaving a hole that is too large for your anchor, do not attempt to force the screw in. For minor issues in wood studs or plaster, you can pack the hole tightly with wooden dowels coated in wood glue or use a specialized epoxy filler designed for masonry. Once the filler cures completely, you can redrill a precise hole. Alternatively, the simplest solution is often to step up to a larger anchor size that fits the newly enlarged hole securely.
A spinning screw is another common problem, usually indicating that the anchor has failed to deploy properly or that the internal threads have stripped. This often happens when using low-quality plastic plugs in hollow walls or over-tightening screws with an electric drill. To fix this, back the screw out carefully, remove the damaged anchor, and replace it with a high-quality toggle bolt or a sleeve anchor that provides positive mechanical latching.
If you encounter severe wall crumbling, deep structural cracks, or if the plaster completely disintegrates when drilling, stop immediately. This level of damage indicates that the underlying wall material is structurally compromised, damp, or improperly mixed. Do not attempt to mount the corner hanger rack on compromised sections, as it will inevitably fail. In such cases, patch the damaged area and consult a qualified professional contractor to assess the wall’s structural integrity before proceeding.
Frequently Asked Questions (FAQ)
Can I install a corner hanger rack without drilling?
While adhesive strips and heavy-duty mounting tapes are popular for lightweight decor, they are generally unsafe for a corner hanger rack intended to hold clothing. High humidity, textured plaster, and freshly painted walls significantly reduce adhesive bond strength, leading to sudden failures. If you are renting or cannot drill, a tension-mounted corner pole system is a safer alternative. These systems rely on a heavy-duty internal spring to wedge a vertical pole securely between a flat, solid floor and a solid ceiling without damaging the surfaces.
How do I prevent the rack from pulling out of a hollow block wall?
Preventing pull-out on a hollow block wall requires using the correct mechanical anchors, such as toggle bolts or sleeve anchors, which expand behind the block’s outer shell. Never use standard plastic expansion plugs, as they cannot grip the empty space inside the block. Additionally, always tighten your screws manually with a hand screwdriver rather than an impact driver. This allows you to feel the resistance and stop tightening before you crush the fragile concrete shell, preserving the anchor’s structural hold.

Community discussion
Share your experience or ask a question. Comments are reviewed before publication.