
Mounting a rack stand on your wall is an excellent way to maximize vertical space, keep your home organized, and display your favorite items. However, a secure installation depends entirely on matching your mounting hardware and drilling techniques to the specific type of wall in your home. Whether you are dealing with solid concrete, concrete hollow blocks (CHB), or lightweight drywall, understanding the structural limits of your wall ensures your rack stand remains stable and safe for years to come. High humidity and tropical weather can also affect wall materials over time, making proper anchor selection and installation precision even more critical.
Pre-Installation Checks and Tool Preparation
Identifying your wall type is the first and most crucial step before you begin drilling. In many homes in the Philippines, exterior walls and ground-floor partitions are constructed from solid concrete or concrete hollow blocks (CHB). Upper floors, room partitions, or newer renovations often utilize drywall or fiber cement boards mounted on metal or wooden studs. To identify your wall type, tap firmly on the surface with your knuckles. A dull, solid thud indicates concrete or masonry, while a hollow, resonant sound suggests drywall, fiber cement, or hollow blocks. You can also use a stud finder to locate the hidden framing behind hollow surfaces.
Before drilling, consult the manufacturer’s label or instruction manual to verify the maximum load rating of your rack stand. This rating dictates how much weight the shelves can safely support, including the weight of the stand itself. Measure your available wall space carefully, ensuring there is sufficient clearance from doorways, window frames, and light switches. Take note of the finished dimensions of the rack stand to avoid placing it in high-traffic pathways where it might be bumped. Never exceed the manufacturer’s specified weight limit, as doing so can lead to structural failure regardless of how well the stand is anchored.
Products mentioned in this guide

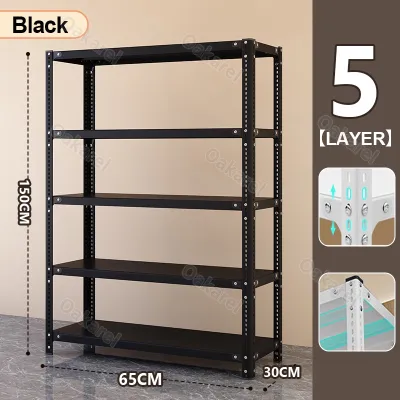
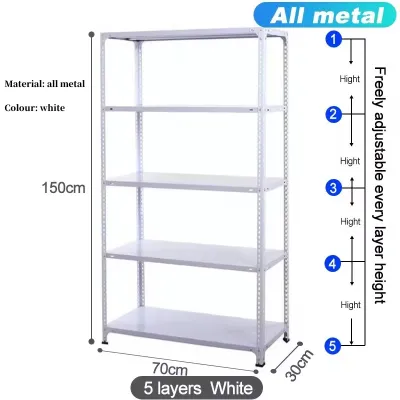
Prices are valid at publication and may change. Please refer to the product page for the latest price.
A successful installation requires a power drill suited to your wall type. For solid concrete and masonry, a hammer drill is highly recommended, as standard rotary drills struggle to penetrate dense concrete. For drywall or wood studs, a standard rotary drill is sufficient. You will also need a spirit level to ensure the shelves are perfectly horizontal, a tape measure, a pencil for marking, and safety goggles to protect your eyes from falling dust. Having these tools ready beforehand prevents interruptions and ensures a more precise installation process.
Using the wrong anchor is the most common cause of wall shelf failure. Solid concrete requires plastic expansion plugs or metal expansion bolts that grip the dense material when a screw is driven in. Hollow blocks and drywall require specialized fasteners like toggle bolts, spring toggles, or self-drilling hollow-wall anchors that expand behind the wall surface to distribute weight. Never rely on simple plastic plugs in hollow walls or drywall, as they will easily pull out under load. Always match the diameter of your drill bit to the specifications of the anchor you are using.
Installing on Solid Concrete and Masonry Walls
Begin by holding the rack stand’s mounting bracket or template against the wall at your desired height. Place a spirit level on top of the bracket to ensure it is perfectly level. Once aligned, use a pencil to mark the exact center of each screw hole onto the concrete surface. Double-check your measurements from the floor or ceiling to ensure the placement looks visually balanced in the room. Taking your time during this step prevents lopsided shelves that are difficult to correct later.

Select a masonry drill bit that matches the exact diameter of your plastic expansion anchors. If you are using a 6mm anchor, use a 6mm masonry bit. To avoid drilling too deep, measure the length of the anchor against your drill bit and wrap a piece of painter’s tape around the bit at that exact depth. This tape serves as a clear visual guide, letting you know exactly when to stop drilling. Drilling too deep can weaken the wall grip, while drilling too shallow will leave the anchor protruding.
Hold the hammer drill perpendicular to the wall, apply firm and steady pressure, and pull the trigger. Let the drill’s hammering action do the work rather than forcing it forward with excessive body weight. Once you reach the tape marker, pull the drill bit out while it is still spinning to help extract loose concrete dust. Use a hand blower, a vacuum cleaner, or a straw to blow out any remaining dust from inside the hole, as leftover debris can prevent the anchor from seating properly.
Push the plastic expansion anchors into the clean holes. They should fit snugly; if they resist, tap them gently with a hammer until they are flush with the concrete surface. Align the mounting bracket over the anchors, insert the screws, and tighten them using a screwdriver or a drill with a low clutch setting. Avoid over-torquing the screws, as this can strip the plastic threads inside the anchor or crack the surrounding concrete, compromising the hold. Once tightened, give the bracket a firm tug to verify its stability.
Installing on Hollow Blocks and Drywall
When mounting on drywall or fiber cement boards, the most secure method is to screw directly into the wooden or metal studs behind the wall. Use a stud finder to locate the edges and center of each stud, and mark these positions. If the studs do not align with your desired rack stand placement, or if you are mounting on concrete hollow blocks (CHB) where the interior of the block is empty, you must use heavy-duty hollow-wall fasteners like toggle bolts. These fasteners grip the backside of the wall board to distribute the weight over a larger surface area.
Toggle bolts consist of a screw and a spring-loaded wing assembly. Because the wings must fold flat to pass through the wall, you will need to drill a significantly larger clearance hole than you would for a standard screw. Check the toggle bolt packaging for the recommended drill bit size. Drill carefully through the drywall or the outer shell of the hollow block, ensuring you do not apply excessive pressure that could blow out the back of the wall board or create an oversized, messy hole.
Thread the toggle wings onto the bolt with the tips of the wings pointing toward the bolt head. Insert the bolt through the mounting hole of your rack stand bracket first, then squeeze the wings closed and push them completely through the drilled hole in the wall. You will hear or feel the wings spring open once they clear the back of the drywall or hollow block. Pull back slightly on the bracket to create tension, which keeps the wings from spinning while you tighten the bolt with a screwdriver until it sits flush and secure.
Drywall and thin fiber cement boards have strict structural limitations. Never attempt to mount heavy rack stands, large display units, or shelves intended for heavy books or kitchen appliances directly onto drywall without direct stud support. If you notice the wall board flexing, cracking, or showing signs of moisture damage—which is common in humid tropical climates—stop the installation immediately. In these cases, relocate the rack stand to a solid concrete wall or consult a professional carpenter to reinforce the wall structure before proceeding.
Post-Installation Verification and Load Testing
Once all screws and bolts are tightened, place your spirit level back onto the rack stand shelves. Check both the left-to-right level and the front-to-back alignment. If the stand is slightly tilted, loosen the mounting screws slightly, adjust the bracket within the play of the screw holes, and retighten. Ensure there is no wobbling or play between the bracket and the wall surface. A perfectly level installation ensures that items placed on the shelves will not slide or roll off.
Do not immediately load the rack stand to its maximum capacity. Begin by placing a few lightweight items on the shelves and observing how the brackets and wall respond. Gradually add more weight over several hours, checking for any signs of distress such as wall cracking, anchors pulling away from the surface, or the brackets sagging downward. If you notice any movement, remove the items immediately and inspect the fasteners. This gradual test helps prevent sudden structural failures and protects your belongings.
Over time, daily use, vibrations, and changes in indoor humidity can cause fasteners to loosen slightly. Make it a habit to inspect your wall-mounted rack stand every few months. Gently wiggle the frame to check for stability and use a manual screwdriver to tighten any loose screws. Additionally, inspect the wall area around the anchors for signs of moisture, mold, or structural shifting, especially during the wet season, to ensure the mounting environment remains dry and structurally sound. Regular maintenance extends the lifespan of both your wall and your furniture.
Frequently Asked Questions (FAQ)
Can I install a heavy rack stand on drywall without finding a stud?
It is highly discouraged to mount a heavy rack stand directly on drywall or fiber cement board without securing it to a stud. While high-quality toggle bolts and hollow-wall anchors can support moderate loads, drywall itself lacks the shear strength to handle heavy, dynamic, or cantilevered weight over time. The constant downward pull can cause the drywall to crumble or tear, leading to a sudden failure. If you cannot locate a stud, limit the shelf contents to lightweight decorative items, or relocate the installation to a solid concrete wall to prevent damage and potential injury.
What should I do if the drill bit hits an obstacle inside the wall?
If your drill bit suddenly stops advancing or you feel a change in resistance, stop drilling immediately. Forcing the drill can damage critical structural elements like steel rebar inside concrete, or worse, puncture electrical conduits or water pipes hidden behind the wall. Use a multi-scanner or metal detector to identify what is behind the surface. If you confirm an obstacle is present, do not attempt to drill through it; instead, patch the shallow hole and relocate your mounting points slightly higher, lower, or to the side where the path is clear.

Community discussion
Share your experience or ask a question. Comments are reviewed before publication.