
To securely mount a bag organizer rack shelf, you must match your mounting hardware to the specific wall material—whether it is solid concrete, hollow drywall, or ceramic tile. Choosing the wrong anchor or drilling technique can lead to sagging shelves, damaged walls, or falling bags. By understanding the structural characteristics of your walls and using the correct tools, you can create a stable storage solution that keeps your bags organized and easily accessible.
Preparing for Installation: Tools and Safety Checks
Before you begin drilling, it is essential to prepare your workspace and gather the correct equipment. Start by reviewing the manufacturer’s instructions for your bag organizer rack shelf. These documents contain critical specifications regarding weight capacity, recommended mounting heights, and the specific hardware required for a safe installation. Keep in mind that the screws and anchors included in the retail packaging are often generic and may not be suitable for your specific wall type.
Identifying the composition of your wall is the next crucial step. In many homes in the Philippines, interior walls are constructed from solid concrete or concrete hollow blocks finished with a layer of plaster. Modern condominiums and renovated spaces, however, frequently utilize drywall partitions mounted on light metal or wooden studs. Knowing exactly what lies behind your paint or plaster prevents structural mistakes and ensures you select the correct anchoring system.
Products mentioned in this guide
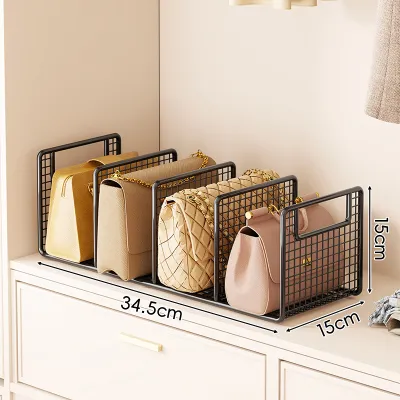
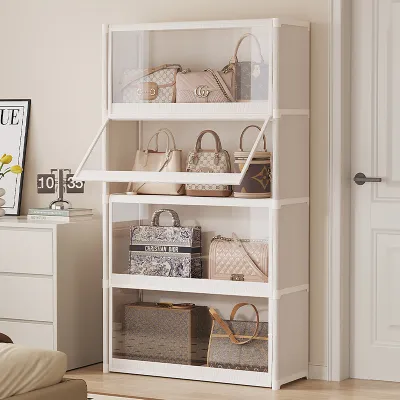
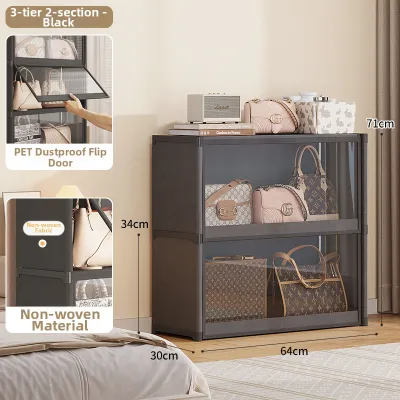
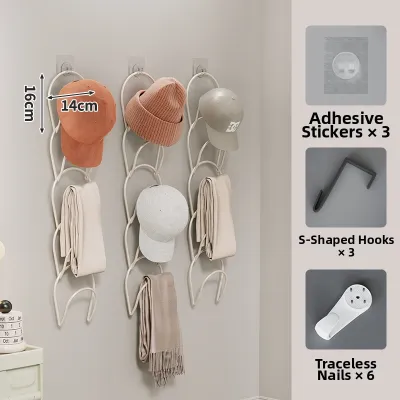
Prices are valid at publication and may change. Please refer to the product page for the latest price.
Safety must remain a priority throughout the installation process. Before drilling any holes, use a reliable stud finder or wall scanner to locate hidden electrical wiring, water pipes, or structural studs. This step is vital to avoid costly utility damage or hazardous electrical contact. Once you have cleared the area, assemble your essential tools: a variable-speed power drill, a spirit level to ensure a perfectly straight mount, a measuring tape, a pencil for marking, safety goggles, and a dust mask to protect against airborne debris.
How to Mount on Concrete or Masonry Walls
Concrete and masonry walls offer exceptional load-bearing capacity, making them ideal for supporting heavy bag organizer rack shelves. However, drilling into these dense surfaces requires specialized tools and techniques. You will need a high-quality masonry drill bit, which features a carbide tip designed to grind through stone, concrete, and plaster without dulling. Standard wood or metal drill bits will quickly overheat and fail if used on concrete.

To begin, hold your rack or mounting brackets against the wall at your desired height. Use a spirit level to ensure the unit is perfectly horizontal, then mark the drilling points through the bracket holes with a pencil. When preparing to drill, measure the length of your plastic wall plugs or expansion anchors. Wrap a piece of colored electrical tape around your drill bit at this exact length to serve as a visual depth guide, ensuring you do not drill too deep or too shallow.
Set your power drill to the hammer function if you are working with dense concrete, as the rapid hammering action helps break up the aggregate. Hold the drill perfectly perpendicular to the wall and apply steady, firm pressure. Drill slowly at first to establish a clean pilot hole, then increase the speed. Periodically pull the drill bit out of the hole while it is spinning to clear out accumulated concrete dust; in humid tropical climates, trapped dust can quickly bind with moisture and clog the hole, preventing the anchor from seating properly.
Once the holes are drilled to the correct depth, insert the plastic wall plugs or expansion anchors. They should fit snugly and require a light tap with a hammer to sit flush with the plaster surface. If an anchor slides in too easily or falls out, the hole is too large, and the anchor will not hold. Align your bag organizer rack shelf brackets with the installed anchors, insert the screws, and tighten them securely. Avoid over-tightening with a power driver, as this can strip the plastic threads inside the anchor and compromise the hold.
How to Mount on Drywall or Hollow Walls
Drywall and hollow plasterboard walls require a completely different approach because the gypsum core lacks the density to hold standard screws or plastic expansion plugs. If you attempt to screw a bag organizer rack shelf directly into drywall, the weight of the bags will quickly pull the screws out, leaving large, unsightly holes. The most secure method for mounting on drywall is to anchor the rack directly into the underlying wooden or metal studs.
Use a stud finder to locate the vertical studs behind your drywall. In modern residential construction, studs are typically spaced 16 or 24 inches apart. If your bag organizer rack shelf’s mounting holes align with these studs, you can secure the rack using standard wood screws (for wooden studs) or self-tapping sheet metal screws (for metal studs). This direct connection to the building’s frame provides the highest possible weight capacity.
When the mounting holes do not align with the studs, you must use heavy-duty hollow wall anchors. Toggle bolts, also known as butterfly anchors, are highly recommended for this scenario. These fasteners feature spring-loaded metal wings that fold flat to pass through a pre-drilled hole, then spring open behind the drywall to distribute the weight over a much larger surface area. Alternatively, threaded drywall anchors can be screwed directly into the wall to provide a moderate hold for lighter organizer racks.
To install toggle bolts, drill a pilot hole matching the diameter specified on the anchor packaging. Thread the toggle wings onto the bolt with the bracket already in place, compress the wings, and push them through the hole until you hear them snap open behind the drywall. Pull back slightly on the bolt to create tension against the inside of the wall, then tighten the bolt with a screwdriver until the bracket is firmly secured against the drywall surface.
How to Mount on Tiled Walls
Mounting a bag organizer rack shelf on a tiled wall—such as in a bathroom, kitchen, or entryway—requires extreme care to prevent the ceramic or porcelain tiles from cracking or shattering. Standard masonry bits and high-impact hammer drills will easily crack glossy tile surfaces upon contact. To succeed, you must use a specialized tile or glass drill bit, which features a spear-shaped carbide tip designed to shave through hard glazes smoothly. Investing in a high-quality drill bit set, which typically costs between ₱300 and ₱1,200, is far more economical than repairing cracked tiles or damaged plaster.
Start by marking your mounting points on the tile surface. Because tile glazes are incredibly slick, a drill bit will naturally slide or “wander” when you start drilling, scratching the surrounding tile. To prevent this, apply a piece of textured masking tape or painters tape directly over your pencil marks. The tape provides the necessary friction to keep the drill bit centered during the critical initial rotations.
Position your drill perpendicular to the tile and begin drilling at a very low speed with light, consistent pressure. Ensure your drill is set to standard rotary mode; never use the hammer-drill setting while drilling through the tile itself, as the high-frequency impacts will instantly shatter the ceramic material. Keep a small cup of water nearby and periodically dip the tip of the drill bit into it to cool the metal, preventing thermal stress from cracking the tile.
Once the drill bit has successfully penetrated the entire thickness of the tile and reached the underlying concrete or drywall, stop drilling. Switch your drill bit to a standard masonry or wood bit, depending on the material behind the tile. If the backing is concrete, you may now switch your drill to hammer mode, but proceed with caution to ensure the chuck of the drill does not strike and damage the face of the tile. Insert your wall anchor through the tile so that it expands in the backing material, not within the tile itself, to avoid cracking the ceramic as you tighten the screws.
Final Verification and Safe Loading Practices
After successfully mounting your bag organizer rack shelf, you must verify its stability before loading it with your belongings. Begin by gently tugging on the brackets to check for any immediate movement, play, or loose connections. If the rack wobbles or the wall anchors show signs of pulling away, do not proceed with loading; instead, remove the rack and inspect the anchors for proper expansion or fit.
Perform a gradual weight test to ensure the installation can handle daily use. Start by placing lightweight items, such as empty canvas totes or small accessories, on the shelf. Over the course of a few hours, gradually add heavier items, such as leather handbags or backpacks, while listening closely for any creaking sounds or visual signs of bracket bending. This step-by-step approach allows the wall anchors to settle under load safely.
Proper weight distribution is critical for maintaining the structural integrity of your wall mount over time. Avoid clustering all heavy bags in a single section of the shelf; instead, distribute the weight evenly across the entire length of the rack. If your organizer features both a shelf and hanging hooks, place heavier items closer to the wall brackets where the support is strongest, and reserve the outer hooks or cantilevered sections for lighter items.
Regularly monitor the installation for warning signs of structural fatigue. If you notice hairline cracks developing in the plaster around the brackets, drywall bulging, or a widening gap between the rack and the wall, immediately remove all weight from the shelf. These signs indicate that the anchors are failing or that the wall material is degrading, requiring you to reinstall the rack using stronger fasteners or in a different location.
Frequently Asked Questions (FAQ)
Can I use adhesive strips instead of drilling for a bag organizer rack shelf?
While heavy-duty adhesive strips are convenient for lightweight decor, they are generally unsuitable for securing a bag organizer rack shelf. Handbags, backpacks, and totes carry dynamic, shifting loads; every time you place a bag on the shelf or pull it off a hook, you apply sudden downward force that far exceeds the static weight limit of adhesives. Furthermore, high humidity levels common in tropical climates can rapidly degrade adhesive backings, leading to sudden, catastrophic failures. Over time, heavy adhesives can also peel away paint, plaster, or drywall paper, causing significant surface damage. For long-term reliability and safety, mechanical fasteners like screws and wall anchors are always recommended.
What should I do if the wall anchor spins or won't grip?
A spinning wall anchor usually indicates that the pilot hole was drilled too large, or that the surrounding wall material has crumbled and lost its structural integrity. To resolve this issue, you can remove the spinning anchor and replace it with a larger diameter anchor that fits tightly into the existing hole. If you are working with concrete or wood, another effective solution is to pack the hole with wooden toothpicks or a small dowel coated in wood glue, allow it to dry, and then re-insert the anchor or screw. If the wall material is severely damaged or hollowed out, it is best to patch the hole with a suitable wall filler, allow it to cure completely, and relocate your mounting bracket at least a few centimeters away to drill a fresh, properly sized hole.
How do I maintain the rack and wall mounts over time?
Maintaining your bag organizer rack shelf requires periodic inspections to ensure ongoing safety and stability. Every few months, check the mounting screws and gently tighten any that have loosened due to daily vibrations or weight shifts. Inspect the wall surface immediately surrounding the brackets for signs of cracking, plaster dust, or moisture damage, which can weaken the wall’s holding power. Additionally, clean the rack itself according to the manufacturer’s material care instructions; for metal racks, keeping the surface dry prevents rust and corrosion, while wooden racks may benefit from occasional polishing to protect against humidity-induced warping.

Community discussion
Share your experience or ask a question. Comments are reviewed before publication.