
Integrating a metal shoe organizer into an existing closet storage system requires balancing footwear capacity with the spatial constraints of hangers, shelves, and closet tracks. Selecting the right unit depends on matching the organizer’s dimensions, weight capacity, and mounting style with your specific closet layout. This guide provides the evaluation criteria, measurement protocols, and conditional frameworks needed to build a personalized shortlist from online retailers or local furniture stores, ensuring your chosen metal organizer enhances your closet system without compromising its functionality.
Key Criteria for Integrating Metal Shoe Organizers
To successfully integrate a metal shoe organizer, you must first evaluate how its physical structure interacts with your existing closet components. Dimensional compatibility is the most critical starting point. Verify the exact width, depth, and height of the metal unit against the available floor space or shelf cavities. A rack that is even a few millimeters too wide can block closet doors from closing fully or prevent adjacent drawers from sliding open. Depth is equally vital; standard closets typically measure 60 centimeters deep, meaning your shoe organizer should leave enough clearance to avoid protruding into the door path.
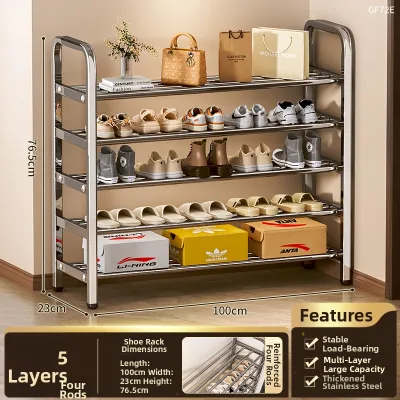
Weight capacity and material gauge dictate the long-term durability of your storage system. Metal organizers are generally constructed from steel, aluminum, or iron, each offering different levels of structural integrity. When reviewing manufacturer specifications, look for the load limit per shelf rather than just the overall weight capacity. Heavy footwear, such as leather boots or thick-soled sneakers, can cause thin-gauge wire shelves to sag over time. Opting for thicker gauge metal or reinforced square tubing ensures the shelves remain rigid under heavy loads and prevents the entire unit from bowing or tipping forward.
Products mentioned in this guide
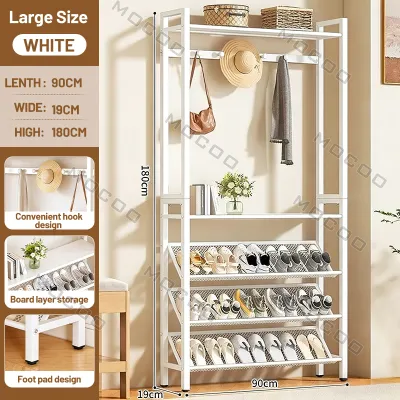
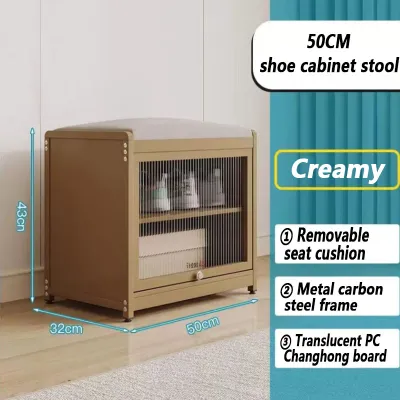
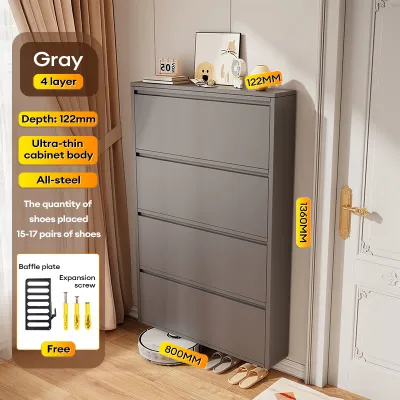
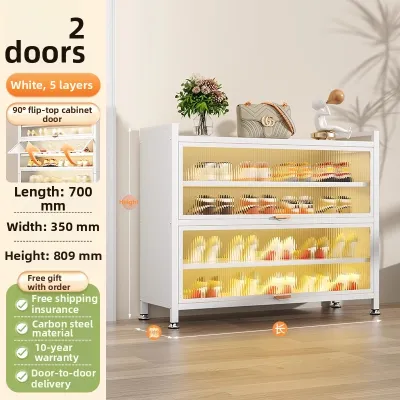
Prices are valid at publication and may change. Please refer to the product page for the latest price.
System integration refers to how the organizer physically connects to or sits within your closet. Some metal shoe organizers are designed as standalone floor units, while others are engineered to mount directly onto existing wooden shelves or clip into wall-mounted closet tracks. If you are integrating a unit into an adjustable track system, verify that the bracket spacing and slot dimensions match your current hardware brand. Mixing incompatible track systems can lead to unstable connections and potential structural failure.
Finally, vertical clearance requirements must be calculated to maintain a functional wardrobe. Ensure there is sufficient vertical space between the top of the shoe organizer and the bottom of your hanging garments. If clothes like long coats, dresses, or trousers drag across the top of your shoes, it can transfer dirt, cause fabric creasing, and restrict airflow. Additionally, consider the bottom clearance of the organizer; units with a raised base or a built-in toe-kick allow easier cleaning underneath and accommodate baseboards without pushing the rack away from the wall.
Types of Metal Shoe Organizers for Closet Systems
Understanding the different form factors of metal shoe organizers allows you to select a design that matches both your closet layout and your daily habits. Pull-out and slide-out metal racks are highly efficient solutions for deep closets or walk-in wardrobes. These systems utilize ball-bearing drawer slides mounted to the side panels or floor of the closet, allowing you to pull the entire shoe display forward for easy access. When planning for a slide-out rack, ensure there is adequate clearance for the tracks to extend fully without hitting door frames or sliding doors.

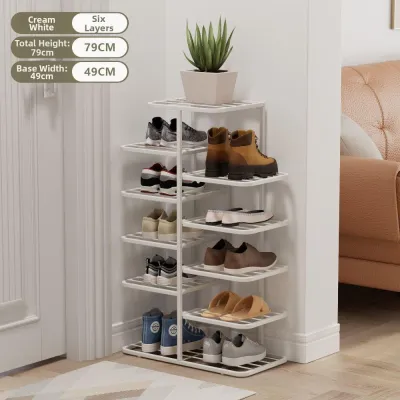
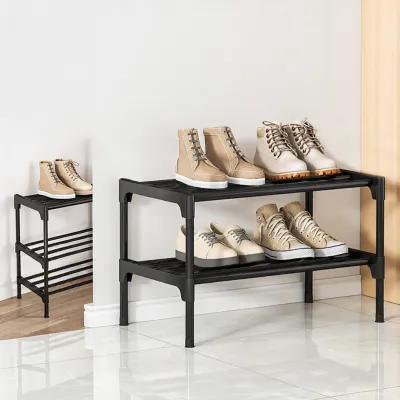
Freestanding stackable metal shelves offer the highest level of flexibility for evolving shoe collections. These units typically feature interlocking frames that allow you to add tiers vertically as your storage needs grow. They are ideal for floor-level placement beneath hanging rods. When stacking these units, it is essential to perform stability checks; taller configurations should be secured to the wall or adjacent closet panels to prevent them from wobbling when you retrieve shoes from the upper shelves.
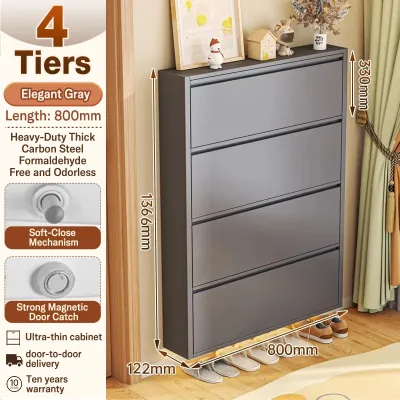
Drop-down or wall-mounted metal units are excellent for maximizing vertical space in narrow reach-in closets or walk-in entryways. These organizers feature slim profiles, often utilizing angled wire grids or pocket-style metal loops that hold shoes at a downward angle. This angled design significantly reduces the depth profile of the organizer, making it possible to store shoes in tight spaces where a flat shelf would not fit. Because these units hang directly on the wall, they demand secure mounting into wall studs or the use of heavy-duty drywall anchors to support the combined weight of the metal frame and the footwear.
Over-the-door or hanging metal organizers provide a practical, space-saving alternative for lightweight footwear like sandals, flats, and slippers. These systems typically hang from the top of a standard closet door using flat metal hooks, or they suspend directly from a robust closet rod. While highly convenient, verify that your door hinges can support the added weight of both the metal organizer and the shoes. For rod-hanging models, ensure the closet rod is securely anchored and made of a material, such as heavy-duty steel, that will not bend under the concentrated load.
How to Measure and Plan Your Closet Space
Accurate measurement is the foundation of a successful closet integration project. Begin by measuring the usable floor width and depth of your closet space. Do not rely on the nominal dimensions of the closet; instead, measure the actual open space between baseboards, door tracks, and existing vertical dividers. Baseboards can reduce the usable width by several centimeters, which might prevent a tight-fitting metal rack from sitting flush against the floor. Additionally, account for the swing path of hinged doors or the overlap of sliding doors to ensure the organizer does not block access.
Next, calculate the vertical clearance between the closet floor and the lowest hanging garments. Hang a few of your longest items, such as coats or maxi dresses, on the rod and measure the distance from the bottom hem of the fabric to the floor. This measurement tells you the maximum allowable height for a floor-standing metal shoe organizer. Ideally, maintain a clearance gap of at least 10 to 15 centimeters between the bottom of your clothes and the top of your shoes to prevent friction, static cling, and dust transfer.
Before purchasing a large, pre-assembled metal unit, map out the delivery path. Measure the width and height of all doorways, hallways, and stairwells leading to your closet. In many homes, tight corners or low ceilings can make it impossible to maneuver a fully welded metal frame into a small closet room. If your access paths are restricted, prioritize flat-packed metal organizers that can be assembled directly inside the closet space.
Finally, identify any potential physical obstructions within the closet. Look for electrical outlets, light switches, baseboard heaters, or low-hanging light fixtures that could interfere with the placement of a tall or wide metal unit. Covering an electrical outlet or blocking a light switch not only limits convenience but can also create safety hazards. Ensure your planned layout leaves these fixtures fully accessible and clear of any metal framing.
Building Your Conditional Shortlist
To narrow down your options, use a conditional framework that matches specific closet scenarios with the most appropriate metal shoe organizer designs.
In Scenario A, where you have a spacious walk-in closet with ample floor space, your primary goal is maximizing visibility and accessibility. For this setup, prioritize wide, freestanding stackable metal shelves or multi-tier pull-out units. These designs allow you to display your entire shoe collection clearly, making outfit selection easier. Look for units with adjustable shelf angles or removable tiers so you can customize the spacing for different shoe heights, from flat sneakers to high heels.
In Scenario B, which involves a reach-in closet with limited depth, space preservation is your main constraint. Focus on slim-profile, wall-mounted, or over-the-door metal organizers. Angled wire racks or vertical hanging metal grids are ideal here because they minimize the outward projection of the shoes, preserving the necessary hanger swing space for your clothes. This ensures your closet doors can close smoothly without pressing against your footwear.
In Scenario C, if your wardrobe consists primarily of heavy footwear, work boots, or leather riding boots, structural strength is the non-negotiable factor. Filter your search for heavy-duty metal gauges, reinforced joints, and higher weight capacities verified by product labels. Avoid lightweight wire grids or plastic-jointed metal racks, which can bend or snap under the weight of heavy boots. Instead, look for welded steel frames or heavy-gauge iron pipes that offer maximum rigidity.
In Scenario D, designed for renters or temporary living arrangements, non-destructive installation is key. Select tension-mounted metal poles or freestanding units that do not require drilling into walls, studs, or existing closet tracks. Tension-mounted systems use spring-loaded vertical poles that secure themselves between the floor and ceiling, providing stable vertical storage without leaving permanent holes. High-quality freestanding racks with wide, stable bases also offer excellent storage capacity without damaging rental property walls. Whether you are budgeting around ₱1,500 for a basic tension rack or investing in a premium modular system, these non-permanent options protect your security deposit.
Installation and Maintenance Checks
Proper installation and regular upkeep are essential to ensure your metal shoe organizer remains safe and functional over time. When installing wall-mounted or track-integrated units, always verify that your mounting hardware matches the wall material. Standard drywall requires specialized toggle bolts or heavy-duty anchors, whereas concrete or brick walls demand masonry anchors and specific drill bits. Never rely on standard wood screws driven directly into drywall, as the weight of the metal rack and shoes will eventually pull the screws out of the wall.
Stability and tipping prevention must be addressed for all tall, freestanding metal units. Racks that exceed one meter in height should be secured to the wall using anti-tip straps or brackets, especially if you live in an area prone to seismic activity or have a busy household. If your closet floor is slightly uneven, look for metal organizers equipped with adjustable floor leveling feet. These threaded feet allow you to compensate for floor slopes, ensuring the unit remains perfectly upright and stable.
Routine maintenance is particularly important in tropical climates like the Philippines, where high humidity can accelerate metal corrosion and dust accumulation. Periodically wipe down the metal surfaces with a dry or slightly damp microfiber cloth to prevent dust buildup. Avoid using harsh chemical cleaners or abrasive pads, which can scratch protective powder coatings or chrome plating and expose the underlying metal to moisture. Regularly check for loose screws, loose brackets, or misaligned drawer tracks, tightening them as needed to maintain structural integrity.
You should halt the installation process and consult a professional if you encounter structural challenges. If installing the organizer requires modifying the existing closet framework, cutting into load-bearing walls, or if the manufacturer’s load limits are unclear, professional guidance is necessary. Ensuring the structural safety of your closet system prevents costly damage to your home and protects your wardrobe investment.
Frequently Asked Questions (FAQ)
Can I mix metal shoe organizers with wooden closet shelves?
Yes, mixing metal shoe organizers with wooden closet shelves is a highly effective way to create a modern, industrial, or transitional aesthetic. To ensure visual cohesion, try to match the metal finishes with your existing closet hardware, such as drawer pulls, hanging rods, or door hinges. For example, matte black or brushed brass metal frames pair beautifully with natural wood tones or clean white shelving. Structurally, you must ensure that heavy metal units do not place uneven stress on adjacent wooden components; place heavier metal racks on the floor or secure them directly to wall studs rather than letting them rest entirely on thin wooden shelves. If physically connecting the two materials, use appropriate transition hardware, such as wood-to-metal screws or specialized brackets, to prevent the wood from splitting.
How do I prevent metal shoe racks from scratching my closet floor?
Protecting your closet flooring from metal furniture legs is simple but crucial for preserving your home’s value. The most effective solution is to apply heavy-duty felt pads, rubber caps, or silicone caster cups to the bottom of the metal legs. These protectors cushion the contact points and allow you to slide the rack slightly during cleaning without leaving scuffs or deep scratches on hardwood, laminate, or tile floors. Alternatively, you can place a low-profile, durable closet mat or runner rug underneath freestanding units to act as a protective barrier. Always check the manufacturer’s instructions, as many high-quality metal organizers come packaged with custom-fit floor protectors designed specifically for the unit’s weight and leg shape.

Community discussion
Share your experience or ask a question. Comments are reviewed before publication.