
Unpacking after a major lipat bahay can quickly become overwhelming when cardboard boxes pile up in your new living room, hallway, or garage. Selecting the right Stante metal shelving layers—or similar adjustable metal storage racks—provides an immediate, structured solution to reclaim your floor space and organize your belongings. The ideal choice depends on matching the unit’s physical dimensions, layer configuration, and weight capacity to the specific items you need to store. By evaluating your new home’s layout and environmental conditions, you can transform chaotic post-move piles into a clean, accessible, and safe storage system.
Optimizing your storage setup requires a clear understanding of your household’s unique needs and the physical limits of your new space. Rather than rushing to stack boxes haphazardly, taking a systematic approach to your post-move organization ensures that your metal shelving remains stable, durable, and highly functional for years to come.
Assessing Your Post-Move Storage Needs
Sorting through your unpacked moving boxes is the first step in establishing an efficient storage system. Group your belongings by weight, fragility, and how often you will need to access them. Heavy kitchen appliances, spare gas cylinders, or automotive tools require a completely different storage strategy than lightweight seasonal decorations, extra bed linens, or plastic toy bins. Labeling each category clearly during this sorting phase prevents you from accidentally placing excessive weight on delicate shelves later.
Products mentioned in this guide
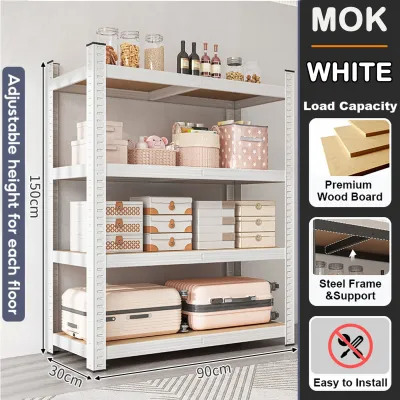
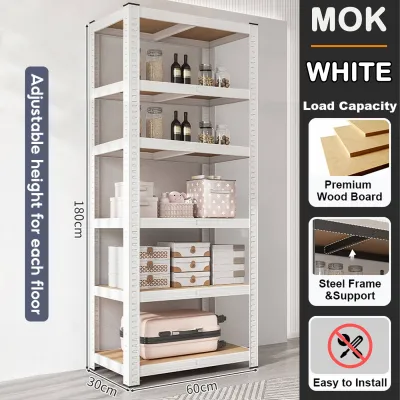
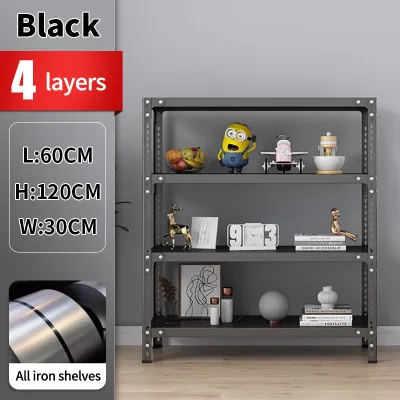
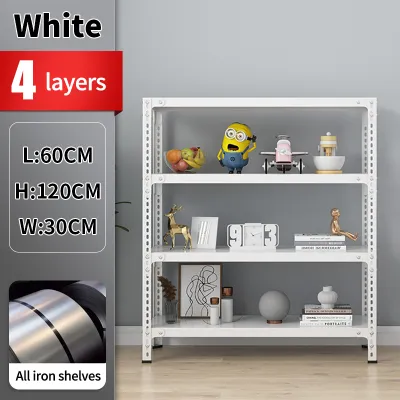
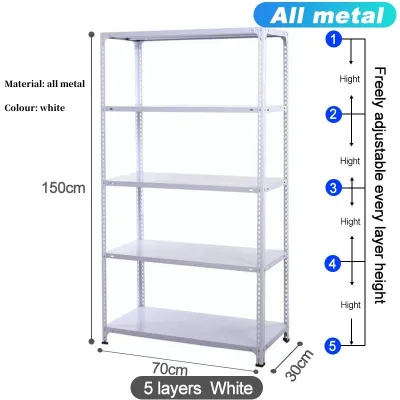
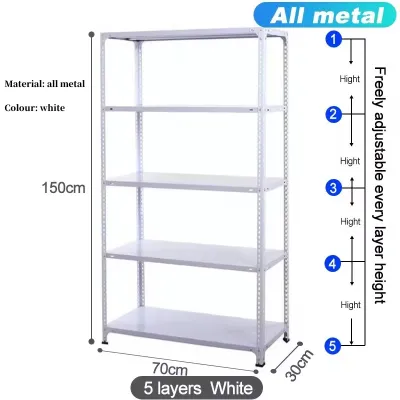
Prices are valid at publication and may change. Please refer to the product page for the latest price.
Consider how often you will reach for these items in your daily routine. Daily essentials, such as pantry staples, frequently used cooking pots, or cleaning supplies, should reside at waist-to-shoulder height for ergonomic access. Items that you only need occasionally, like holiday ornaments, travel suitcases, or document archives, can be designated for the very top or bottom shelves. This systematic categorization forms the blueprint for how many shelving layers you will actually need.
Before purchasing any metal shelving unit, take precise measurements of your designated storage zones. Whether you plan to place the racks in a dedicated utility room, a service kitchen, a hallway alcove, or a garage, measure the available floor footprint (width and depth) as well as the vertical clearance (height). Be sure to account for baseboards, wall outlets, light switches, and overhead fixtures like ceiling fans or light bulbs that could obstruct a tall shelving unit.
In tropical climates, environmental factors play a massive role in long-term storage success. High humidity levels, especially in semi-outdoor laundry areas, dirty kitchens, or ground-floor garages, can accelerate wear on both your stored items and the shelving itself. Identify whether your chosen storage zone is prone to dampness, direct sunlight, or wind-blown rain, as these conditions will dictate the type of protective finish your metal shelving must have to prevent rust and deterioration.
Key Dimensions for Evaluating Metal Shelving Units
When browsing Stante metal layer options or similar shelving, pay close attention to the number of tiers and their adjustability. A standard four-layer or five-layer unit offers excellent versatility, but the key feature to look for is adjustable shelf heights. Racks with customizable slot intervals allow you to raise or lower individual shelves to accommodate tall plastic storage tubs, bulky rice dispensers, or compact organizer baskets without wasting valuable vertical space.

Never guess the weight capacity of a shelving unit. Always check the manufacturer’s official product label or instruction manual for the maximum load limit per shelf, as well as the total weight capacity for the entire unit. These limits are typically calculated based on evenly distributed weight. If you plan to store heavy items like water gallons, toolboxes, or cast-iron cookware, verify that the individual shelf rating can safely support these loads without bowing or warping.
The longevity of metal shelving in humid environments depends heavily on its surface treatment. Look for units with durable powder-coated finishes or galvanized steel construction. Powder coating provides a thick, protective barrier against moisture and scratches, making it highly suitable for indoor pantry and utility room use. Galvanized options offer excellent resistance to rust, making them a practical choice for semi-outdoor spaces, garages, or areas exposed to ambient moisture.
Examine the structural design of the shelving frame and the shelves themselves. Some units feature solid metal panels, while others utilize wire decking or high-density fiberboard (HDF) inserts. Wire decking allows for superior airflow, which is highly beneficial in humid climates to prevent mold and musty odors from building up on stored linens or cardboard boxes. Solid metal shelves, on the other hand, prevent small items from slipping through and are easier to wipe clean.
Matching Shelving Configurations to Household Items
To maintain structural stability and prevent tipping hazards, always place your heaviest items on the lowest shelves. Large kitchen appliances, bulk food supplies like sacks of rice, heavy toolkits, and spare water containers should be positioned on the bottom layer. This lowers the unit’s center of gravity, making the entire assembly significantly more stable and resistant to accidental bumps or seismic movement.
The middle shelves—typically the second and third layers of a five-tier unit—are the most accessible zones. Reserve these spaces for items you use on a weekly or daily basis. In a pantry setup, this is where you should store canned goods, condiments, and dry ingredients, ideally organized within clear plastic bins or baskets. In a utility room, use these middle layers for laundry detergents, iron assemblies, and clean towels, keeping them within easy arm’s reach.
The top layers of your metal shelving should be reserved exclusively for lightweight, non-fragile, or seasonal items. Sleeping bags, empty travel suitcases, extra pillows, and holiday decorations are perfect candidates for these high shelves. Avoid placing heavy boxes or fragile glassware on the top tiers, as retrieving them from above shoulder height increases the risk of drops, personal injury, or damage to your belongings.
To maximize the efficiency of your metal shelving layers, integrate modular storage containers. Placing loose items directly on metal shelves can look cluttered and make cleaning difficult. Using uniform plastic storage boxes with secure lids protects your belongings from dust, pests, and ambient humidity while creating a neat, uniform appearance. Label each container clearly so every family member knows exactly where to find specific items after the move.
Space Planning and Assembly Considerations
Before you begin assembling your new metal shelving, map out the path from your delivery point to the final installation room. Check the width and height of doorways, narrow hallways, and stairwells to ensure that the shelving components—or the fully assembled unit, if you choose to build it elsewhere—can pass through without scratching your newly painted walls. If your new home is in a high-rise condominium, verify the dimensions of the service elevator beforehand.
Once you reach the target room, check the levelness of the floor. Uneven flooring is common in older homes, garages, and tiled utility areas. Many high-quality metal shelving units come with adjustable leveling feet that allow you to compensate for minor floor slopes. Ensuring the unit sits perfectly level is crucial, as even a slight tilt can compromise its structural integrity and cause stored items to slide or shift over time.
Safety should always be your top priority, particularly in households with young children, active pets, or in regions prone to earthquakes. Tall shelving units, especially those over 1.5 meters, should be securely anchored to the wall. Follow the manufacturer’s instructions for installing anti-tip brackets or wall straps. Anchor the unit directly into concrete walls using appropriate masonry plugs, or locate wall studs if installing against drywall, to prevent any risk of the rack tipping forward.
Take your time during the assembly process. Carefully read the manufacturer’s step-by-step guide and gather the recommended tools, such as a rubber mallet or a socket wrench, before starting. Ensure that every beam, bracket, and shelf support is fully seated and locked into the upright posts. Once assembly is complete, perform a thorough check of all connection points and joints to verify they are tight and secure before placing any weight on the shelves.
Frequently Asked Questions (FAQ)
How do I maintain metal shelving in humid areas of the house?
To preserve your metal shelving in humid areas like dirty kitchens or garages, establish a routine maintenance schedule. Periodically wipe down the metal frames with a dry or slightly damp microfiber cloth to remove accumulated dust and condensation, which can trap moisture against the surface. Avoid using harsh chemical cleaners or abrasive scrubbing pads that could scratch the protective powder coating or galvanized finish. Ensure there is adequate ventilation around the unit by leaving a small gap between the shelving and the wall, allowing air to circulate freely and preventing damp pockets from forming.
Can I add extra layers to an existing metal shelving unit?
Adding extra layers to an existing metal shelving unit is only safe if the manufacturer explicitly supports modifications and provides compatible extension parts. Check your product manual or contact the manufacturer to verify if additional shelf panels or extension poles are available for your specific model. If you do add extra layers, remember that doing so does not increase the unit’s overall weight capacity. You must recalculate the weight distribution to ensure the combined weight of all items across all shelves remains well within the manufacturer’s original total load limit.
What is the safest way to disassemble metal shelves for a future move?
When disassembling metal shelves for a future move, always work from the top down. Begin by completely unloading all items from the shelves to prevent accidental falls. Carefully unanchor the unit from the wall before attempting to loosen any structural joints. Use the appropriate tools, such as a rubber mallet, to gently tap the shelf supports upward to release them from the upright posts without bending the metal. Keep all small hardware, screws, and leveling feet organized in a labeled plastic bag, and wrap the individual metal beams and shelves in bubble wrap or moving blankets to protect their finishes and prevent sharp edges from scratching other furniture during transport.

Community discussion
Share your experience or ask a question. Comments are reviewed before publication.